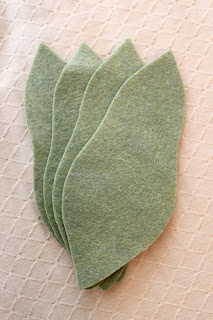
Green and brown felt
Fiberfill
Crafting glue
Needle and thread
Using the pattern below, cut all the pieces out of felt.
To create the body of the pear:
Arrange 2 pieces of the body of the pear together.
Start sewing from 1/4 of an inch down from the top of one side all the way to the bottom of the same side. {The top is where we will leave our opening for filling}
Arrange in the 3rd side of the pear, again attaching it by sewing from the top to the bottom.
Conclude by sewing the fourth and final piece into place.
The top of your pear should remain open, the bottom should be sewn shut.
When all sides are sewn together, your pear will look like this.
At the bottom of the pear, you may notice a bit of a gap.
Sew a straight line across the bottom, closing up the gap.
Trim off excess.
Turn your pear right side out.
Generously fill with fiberfill.
Apply a dab of glue to the bottom of your pear.
Attach the brown circle of felt to the glue.
To create your stem:
Tightly roll up the brown square of felt from the pattern. Using a needle and brown thread, sew the seam on the stem shut.
Insert the stem into the opening of your pear.
With a needle and thread sew the top of your pear shut. In the process, secure the stem into place.
Optional: to give your pear more shape, you can add some dimples where your pear begins to narrow at each side.
And there you have it.
From top to bottom...
I think these are the perfect pair.
If you enjoyed this tutorial and want to see more,simply click here.


Wow, where have you been all my life? Thank you for your great felt food tutorials. Last year we gave my toddler a play kitchen for Christmas with the resolution to make her felt food through out the year. I made a few things like strawberries, pancakes and eggs, and cookies. Now for this Christmas I want to fill up her mini pantry!
ReplyDeleteJenn! Thank you so much for giving this post some comment love. I hope this tutorial does help you fill up your daughter's mini pantry. If you do, I'd love to see pictures.
DeleteI too have loved the felt food idea for my kids' play kitchen, but thought I'd just buy some. Now that I've found your site, and your great tutorials, I am making them myself. I'm making some tonight for an upcoming party this weekend! Thank you so much for your easy instructions, and free printables.
ReplyDeleteThank you so much Kylha. I am so happy these tutorials are still being used. I hope you were able to fill your play kitchen with your own homemade version of I heart fake foods. Thanks for taking the time to leave such a sweet comment.
Delete