Showing posts with label ampersand pillow tutorial. Show all posts

Monday, January 16, 2012

Fabric Flower Corsage or Barrette

A perfect accessory for little girls...


And big girls too.


Want to make one? Gather the following supplies:

Scrap Fabric *I used silk for the cream flower, cotton for the grey flower and polyester blend for the purple flowers
Scrap piece of felt
Scissors
Needle and thread

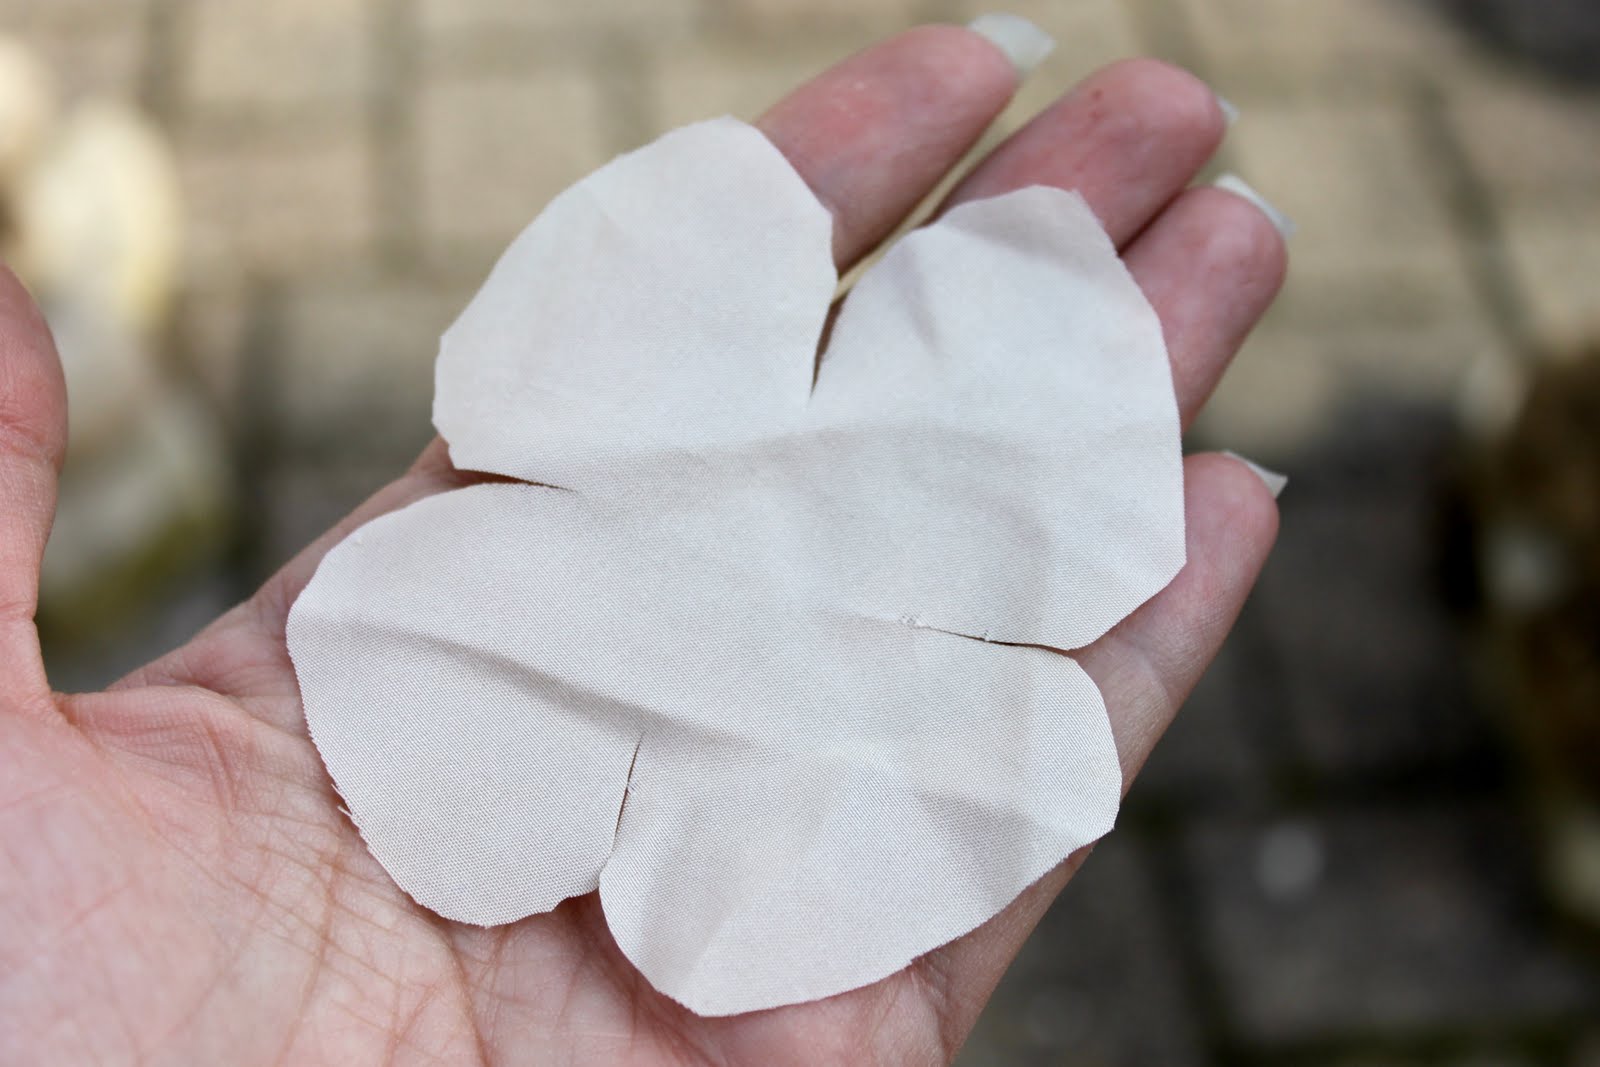
Cut out roughly 20-30 circles {about 3 inches in diameter}. They do not need to be perfect, as you can see from the circle I cut below.


Fold your circle into fourths and cut the sides {cut down towards the center but not all the way through}.


When still folded in fourths, cut the corners so they take a rounded appearance.


Then, unfold your fourth of a circle and it should look like a flower.


Repeat 20-30 times.

Attach a round piece of felt {approximately 1 inch in diameter} to the back center of one flower.


Pinching your next flower petal closed


Start to sew it to the front of your flower, starting in the center.


Repeat with the rest of the flower petals, working from the center out, adding enough to get the size and shape you want your corsage to be. When completed, add a pin to the back and start to accessorize.


Though I love the cream colored corsage, my favorite is the purple corsage. The big difference between the cream corsage and the purple corsage, the material. The cream corsage was made out of silk, the purple was made out of a polyester blend.


The edges of polyester blend can be seared to give your flower a more realistic organic shape. The trick is to bring the polyester blend close to the flame NOT into the flame. The heat from the flame will melt the edges of the polyester.


I used this technique in my very first post for a Flower Brooch and or Barrette Tutorial. You can see the difference between the silk flowers {which you can NOT sear, it will burn, not sear} and the polyester flowers.


This really is a quick and fun afternoon craft. Have fun accessorizing!


*If you do decide to sear your flowers, use great care and attention to detail. Do NOT try and sear cotton or silk fabric. I have only had success in searing a polyester blend.

Thursday, September 22, 2011

Freezer Stenciling Tutorial

Three more pillows done. Cream pillows with brown trim {again, I used the concept from the pillow and piping tutorial, this time, I used a back pocket so that the pillows could be removed from the case}. I love them but lets be honest, they are way too plain.


These, however, make quite a statement.


Can you believe, those pillows were transformed using fabric paint and freezer paper? Interested in learning how, keep reading.

Supplies:
Freezer paper
Fabric paint (I bought mine at Joann's for under $2 a bottle, there are a wide variety of colors)
Sponge (there are specific sponges you can buy but I like to save money so I used a sponge I already had, cutting a section off to make it easier to use)
Fabric you want to paint along with a smaller test piece of fabric
Scissors and or X-acto knife
An Iron
A Design (you can print anything and use that for your pattern)

Decide on your design, I printed out an ampersand {font: Baskerville Old size: 600}. Cut your design out of paper and use it as a pattern. Trace your design onto freezer paper. Trace on the paper side, not the shiny side.


Now that the design is drawn out on freezer paper, begin to cut it out. The first time I tried using freezer paper, I didn't realize what I needed to keep, for me, it was the opposite of what I initially thought. You'll want to get rid of the design and keep the white space around it or in it. So, it doesn't matter how you cut the design out BUT it does matter how you cut the lines where your design meets the white space.


Here is what my design looks like cut out.


Grab your fabric, in this case, I used a pillowcase {remove your pillow, before painting}. Fold the pillowcase or fabric in half, pressing down to create a crease, to determine the middle.


Using your crease as a guide, determine placement of your design. Make sure to place the shiny side of the design down and the paper side up.


Using an iron, set to cotton (depending on your fabric, you may need to select another setting), I ironed my design onto the fabric. I started by only ironing down the outside of the design.


Using my paper pattern as a guide, I determine placement of the inside pieces of my freezer paper.


Next iron those pieces onto the fabric {remove your paper design before you iron down the freezer paper}.


Grab your sponge, paint and a piece of cardboard to squirt some of the fabric paint onto. If you have a test piece of fabric, test how the paint will adhere before continuing. Before you begin, you may want to put a towel behind your fabric, in case the paint seeps through.


Dab your sponge into the paint, you don't want a lot of excess paint on your sponge. Start dabbing the paint onto the fabric exposed through your design, work from the edge of the freezer paper into the design. By dabbing into the design, this should help you keep your edges crisper. If you work from the inside of your design out, you may run the risk of pushing some of excess paint under or into the edge of your freezer paper design.


Continue dabbing your paint on all fabric exposed from your design.


When the fabric paint has completely dried, slowly start to peel up the freezer paper.


what you are left with is your design...


& I love it.


I loved it so much, I made 2 more. I used the same concept as described above. In steps, I painted a large circle {I used a large serving platter as a template to trace onto the freezer paper}. When the outer circle was dried, I painted the smaller circle {I used a smaller serving platter as the template}. Finally, I painted the letters in the middle.


I am not sure I'll ever use freezer paper for its intended purpose again.


The only problem, this is Riley's sofa. I worry that most of the time, my pillows will end up looking like this...

Related Posts Plugin for WordPress, Blogger...