Showing posts with label sewing. Show all posts

Tuesday, September 10, 2013

Sleep Mask for Two

Meet Macy.


Macy is a stuffed monkey I designed and made, about 2 years ago.  She has sat nearly forgotten about, until recently.

Grace rediscovered Macy, this past weekend.

Grace then insisted that Macy needed a sleep mask.  Why?


Apparently no child or stuffed monkey is able to sleep without one.

To oblige Grace, I grabbed some felt, fold over elastic, embroidery thread and I made Macy a sleep mask.


Grace then decided that Macy needed to have jammies.

Sigh.

Though I do dabble when it comes to sewing, and though I did succeed in making a coat for Grace last year (the one and only article of clothing I have ever made).


That coat was made from a pattern...and believe it or not, the pattern was super easy.

What I did not have, in this situation, was a jammie pattern for a custom made monkey.

But, who was I to deny the request of a girl and her monkey.


 I took a tank top Grace had outgrown...


channeled my inner Sews N Bows and made Macy a custom nightgown.


As I was custom tailoring the nightgown, one of the discarded pieces of tank top, about to be thrown away, spoke to me and insisted it needed to be made into undies.  So, again, I obliged.


Macy used to be modest about her undies but with Grace proudly showing them off any chance she can, Macy was happy to model them for the blog.


Now Macy can sleep peacefully. 


The things we do for our kids...and their stuffed monkeys!

Monday, August 5, 2013

DIY Award Ribbons

One of my favorite memories from growing up, was a participating in a park district fishing contest.  I remember, at the end of the contest, I was awarded a beautiful blue ribbon with gold embossed lettering announcing my feat.  I can't remember what my ribbon said but I do remember how much I loved it.  


This year we've spent a few weekends in Wisconsin where Grace has stylishly discovered she loves fishing. 


In hopes of creating a similar memory for Grace, a fishing contest was arranged.  And, a fishing contest isn't complete without the much sought after award.


To make your own award ribbons, grab the following supplies:  thick ribbon, coordinating ribbon, scissors, felt circles, hot glue (or a sewing machine), card stock and glue.


Cut your ribbons.  The tails should be cut between 4-6 inches in length.  The ribbon that will be pleated around the felt circle should be cut between 12-14 inches in length.


Glue the coordinating ribbon (the tails) onto the circle of felt.  Using the hot glue glue, secure the wider ribbon around the circle of felt, pleating and puckering it as you go around.


If you aren't afraid of sewing, sewing your ribbon into place gave a cleaner look and finish to the ribbons. 


Decide what you want your ribbons to say and, either in word or PicMonkey, customize your awards.  Since these ribbons were for a fishing contest, the awards were for biggest fish, smallest fish and cutest fish.

Apply a layer of glue around the perimeter of your puckered ribbon and secure a second felt circle.  Then, glue the custom label into place.


When your award ribbons are complete, let the contest begin...


and then have fun deciding who wins which award.


Linked to:

{T} *From Dream to Reality Link Party ** Thursday Linky Party at Osie Moats * Be Inspired by Elizabeth and Co.   * Tutorials and Tips on Home Stories A 2 Z   * I gotta try that   * Off The Hook Link Party  * The Winthrop Chronicles  * Open Call Tuesdays on Salt Tree * Adventures of a DIY MOM * Take a look Tuesday at Sugar Bee Crafts * Blackberry Vine Tuesday To Do Party Coastal Charm * My Uncommon Slice Of Suburbia  * Tip Junkie   

{W}*Riverton Housewives Round Up  *Adorned from Above *Well Crafted Wednesdays *What I Whipped Up Wednesdays * Homemade by You Wednesday * Whimsy Wednesdays * The Fun In Functional * What I learned Wednesday * Someday crafts 

{TH} A Glimpse Inside  *  The Crafty Blogstalker * Made In a Day A Little Knick Knack * House of Hepworth's  * 52 Mantels *
 

Tuesday, September 18, 2012

I made a coat

After a year of procrastinating, I made Grace a coat.  


For a year, I've had a Heidi and Finn pattern for a swing coat that came with the following disclaimer:  all my patterns are great for those just starting to sew and all you need is a sewing machine - no fancy tools needed!

After a year of being intimidated, despite the disclaimer, I printed out the pattern.

Then, after month of looking at this printed pattern, taunting me, I finally bought some herringbone fabric I liked and I cut out the pattern pieces.

 
I let Grace pick out the lining for the inside of her coat, pink, of course.  She used the excess to decorate herself and the dog.  

I obviously overestimated how much lining I needed.
 

Things were going surprisingly well, until it came time to top stitch.

This is where my amateur sewing knowledge becomes really obvious.  I wanted the top of the coat to have black thread and the inside of the coat to have pink thread.

In a panic, I sent Jill from Sew a Fine Seam an email, explaining my problem.  She wrote back minutes later, hopefully not laughing too hard, telling me it was as easy as having the thread in my bobbin pink and the thread on the top of the machine black. 


Thank goodness for wonderful bloggers like Jill because I was able to finish my coat without throwing my sewing machine out the window :)


Believe it or not, despite having made a few pillows and on a fluke a fitted domed circus tent topper, this was my first experience making clothes. 


Are there flaws...yes.


But I don't think Grace noticed or cared.


As I proudly finished my coat, I pinned the following quote:

Don't be afraid to fail, be afraid not to try.


I am so glad I finally decided to try.

Tuesday, September 20, 2011

Pillows and Piping Tutorial

After our Party Like Picasso party, we had to replace the red area rug in our living room. Small price to pay and what should have been a foreseeable issue, that could have been avoided, with having a bunch of 3 year olds crafting with complete freedom. In the end, it could have been a blessing in disguise because I am happy to have a new rug.

Instead of sticking with the reds, we decided to move more towards blues. This left me with several red pillows I had no use for.


I relocated the tan and black pillows {made by my mom} to our now bright white window seat and I decided to disassemble the red pillows and make new pillows myself. This is a big step because 1. I have never sewn a pillow before, though, I have seen them made countless times because 2. I typically have my mom to make them for me.

With my seam ripper in hand (a tool I use often), I took the pillow apart. That's my disassembled pillow. Just below it, fabric for my new pillows. Just beneath that, my new rug!


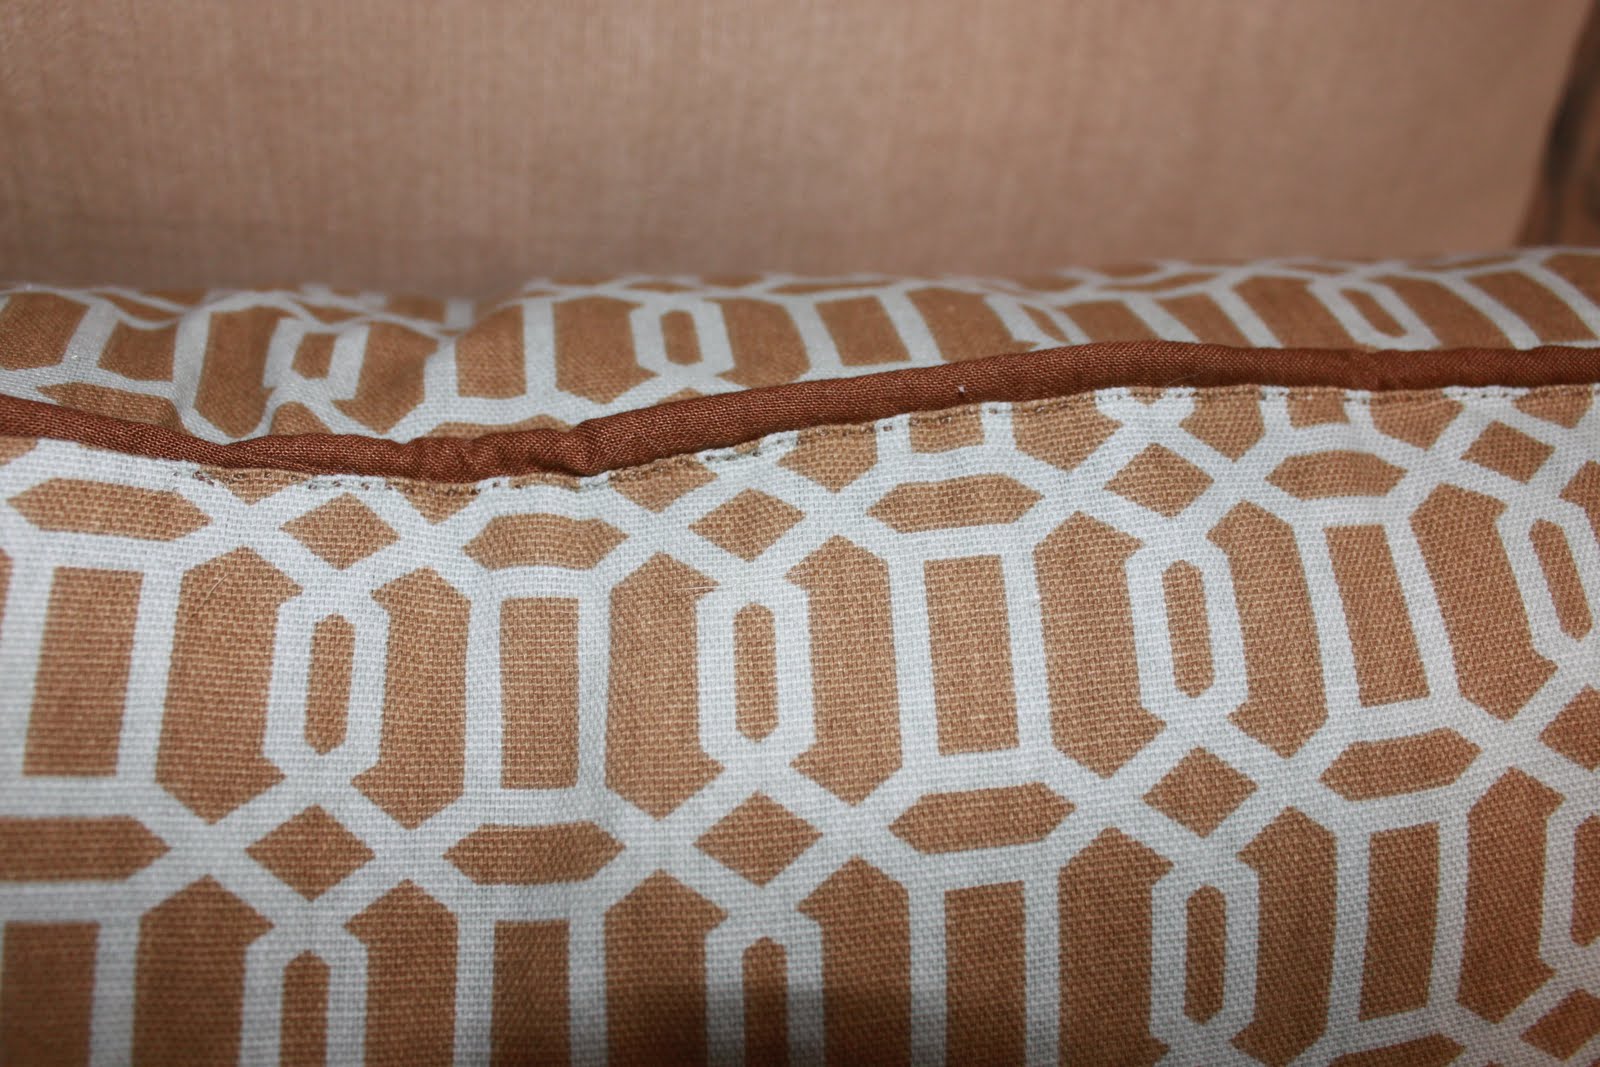
I love the look of piping on pillows. It gives a more finished look. In the spirit of renew, reuse and recycle, I decided to use the piping I just removed from the red pillow to pipe my new pillow. Typically, though, your piping would look like the white rope also pictured below.


I had selected a complimentary brown fabric to use for the piping on my new pillow. Cutting an inch and a half strips of the brown fabric, enough so that you could put the piping in the middle, fold over your strip and still leave at least a 1/4 of an inch of excess to the side of the piping. My material wasn't long enough to have one long strip of brown fabric, so I had to cut several strips in order to get the length I needed.


When your strips have been cut, place your piping inside of your material. The piping will sit in the middle. Fold your fabric in half over the piping.


Prepare your sewing machine. Move your needle to the either the farthest left or farthest right (which ever side you'll be sewing the piping from). If you have a zipper foot, it will make sewing your piping even easier. I, unfortunately, do not have a zipper foot.


I placed my fabric enclosed piping as close to the edge of the foot on my sewing machine. I initially started sewing so that my seam was as close as possible to the piping BUT the closer your stitches are to the piping the more difficult it might be {depending on your skill level} to hide the stitching when sewing your piping into your pillow. I found leaving a little wiggle room, keeping the seam close to the piping but not right up to the piping worked best.

I sewed my piping holding it here...


And guiding it here...


My strips of fabric weren't long enough to encompass the length of my piping, so I connected the strips as I sewed the piping. I folded each end under, overlapping the new fabric into the old fabric. Of course, after the fact, my mom told me that I could have sewn the strips together before I even started sewing my piping. Either way will work.


Continue sewing until your piping is completely sewn into your fabric strips.


The next step is to begin preparing your pillow itself. Using the same disassembled pillow, either the front or the back, lay it onto your fabric and use it as a guide when cutting out the new pillow.


For my new pillow, I was going to sew my pillow into the pillow case, I did not leave a back closure, so I cut both the front and back of my pillow the exact same size. Place your fabric, right sides together and begin to pin your piping in between. The piping will lay inside the pillow with the open edges lining up with the edge of the pillow.


It will go smoother if you pin it. This should prevent your piping from moving as you sew.


Your needle will remain in the same position you used to sew your piping. Continue to guide your piping as you begin to sew it into the pillow. If you left a little wiggle room with the seam on your piping, you should be able to push the piping even closer to the foot in order to make sure the new seam is even closer to the piping than the original seam.


The corners will be the most challenging. Go slow as you approach the corner and continue to go slow as you work your way around the corner. When I reached a corner, with my needle still down, I would lift the foot, turn the fabric and check to see where my piping was, adjusting it if needed.


Make sure to leave a gap un-sewn so that you can stuff your pillow. Turn your pillow right side out. Stuff your pillow insert into your new pillowcase. Then hand sew the opening of the pillow closed.


Here is where my strips of fabric overlapped, when I was sewing my piping.


I had one or two spots where, if you look close enough, the seam from my piping did not get covered by the new seam of the pillow.


One pillow done, 6 more to go...

Related Posts Plugin for WordPress, Blogger...