The watercolor leaves we made earlier this month, have now all been filled out with many great reminders of what we have to be thankful for.
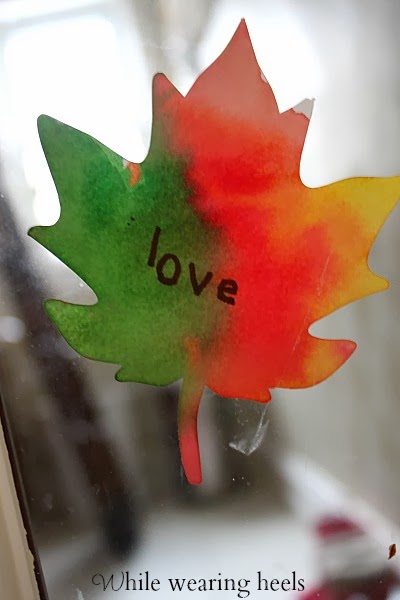
Proudly displayed, on our pantry door, the leaves have reminded us of the things that have left us feeling happy this past month.
Some of those included simple things like flowers.
Some of them were more timely, our first snow arrived and I was reminded how lucky we were to be able to snuggle inside of a warm house while watching the first snowfall of the year.
And, everyday, I feel truly blessed to have a not only a warm home but one filled with much love.
My list, though, would not be complete without including, this blog, the friendships I have made because of it and all the people who take the time to stop by and visit. So, to all of you, I am thankful.
Happy Thanksgiving!
Showing posts with label watercolor. Show all posts
Wednesday, November 27, 2013
Thursday, November 7, 2013
Watercolor Leaves
One of the most memorizing aspects of fall are the beautiful colors nature creates. It's amazing to see how once alive, green leaves, in autumn, will change to the most spectacular colors as they die and fall to the ground.
Those beautiful fall leaves are what inspired a DIY version in watercolor form. You could even say, they are a nature knockoff.
To make some of your own watercolor leaves, start by cutting leaves out of cardstock. Our leaves were cut out of white, yellow and pink cardstock, yellow being my favorite.
For each leaf, you'll want to start by painting it with water...yes water. Paint the entire leaf with a coat of water.
Then, slowly begin to add some watercolor paint to your wet leaf.
As the wet watercolor hits the wet leaf, the paint will spread and swirl and take on a life of its own. Continue adding color until you achieve the look you want. If you find your leaf is too wet, simply dab it with a paper towel.
Set your finished painted leaves to the side and allow time for them to dry.
These nature inspired watercolor leaves look great simply as they are...
Or, like we are doing, you could use them to display the things you are grateful for.
Play dates, family and bedtime stories...those are a few of the things are are thankful for.
Tuesday, May 7, 2013
Watercolor Silhouette Art
Grab your little artist and get ready to make some watercolor silhouettes art pieces.
You can make a silhouette of your first home.
Or even your child's profile.
To make watercolor silhouettes of your own, gather the following supplies: white cardstock, watercolors, a shadowbox and...
an artist to create the masterpiece.
When the finished masterpiece is fully dry, prep it to create your silhouettes. Print out a picture of either your house, your child's profile or even your pet. Precisely cut the outline of your shape of choice. Lay the shape onto the watercolor painting, trace it and then cut the shape out.
Consider some embellishments to add interest and preserve more memories to go along with your watercolor silhouette. For the silhouette of a child, consider having them write out their name, their age or do a hand print.
Embellishments for the house silhouette could be scrabble tiles that spell out HOME, adding your street address or displaying your house key.
Arrange your silhouette, and any embellishments you want to add along with it, into your shadow box.
Then, find a place to proudly display it and admire.
Watercolor silhouettes are a perfect way to turn your child's artwork into a meaningful piece of art you can add to any home decor.
Happy painting!
Originally shared at 'Or so she says...'
Link Party Websites
{T} *From Dream to Reality Link Party ** Thursday Linky Party at Osie Moats * Be Inspired by Elizabeth and Co. * Tutorials and Tips on Home Stories A 2 Z * I gotta try that * Off The Hook Link Party * The Winthrop Chronicles * Open Call Tuesdays on Salt Tree * Adventures of a DIY MOM * Take a look Tuesday at Sugar Bee Crafts * Blackberry Vine Tuesday To Do Party * Coastal Charm * My Uncommon Slice Of Suburbia * Tip Junkie
{W}*Riverton Housewives Round Up *In Bloom Link Party *Adorned from Above *Well Crafted Wednesdays *What I Whipped Up Wednesdays * Homemade by You Wednesday * Whimsy Wednesdays * Blue Cricket Design * The Fun In Functional * What I learned Wednesday * Home Happy Home * Someday crafts
{TH} * Delightful Order* A Glimpse Inside * The Crafty Blogstalker * Made In a Day * A Little Knick Knack * House of Hepworth's * 52 Mantels *
{Sat}*Your Great Idea, Or so She Says *Saturday Show and Tell *Saturday Showcase *Overflowing With Creativity *YOU Inspire Link Party *Be Different Act Normal * Nifty Thrifty Things * I heart naptime * The Sweet Talk Shop * Funky Junk Interiors * Twigg Studios *

You can make a silhouette of your first home.
Or even your child's profile.
To make watercolor silhouettes of your own, gather the following supplies: white cardstock, watercolors, a shadowbox and...
an artist to create the masterpiece.
When the finished masterpiece is fully dry, prep it to create your silhouettes. Print out a picture of either your house, your child's profile or even your pet. Precisely cut the outline of your shape of choice. Lay the shape onto the watercolor painting, trace it and then cut the shape out.
Consider some embellishments to add interest and preserve more memories to go along with your watercolor silhouette. For the silhouette of a child, consider having them write out their name, their age or do a hand print.
Embellishments for the house silhouette could be scrabble tiles that spell out HOME, adding your street address or displaying your house key.
Arrange your silhouette, and any embellishments you want to add along with it, into your shadow box.
Then, find a place to proudly display it and admire.
Watercolor silhouettes are a perfect way to turn your child's artwork into a meaningful piece of art you can add to any home decor.
Happy painting!
Originally shared at 'Or so she says...'

Link Party Websites
{M}
*Watch Out Marta Mondays *Pink Hippo Party * Thrift Share Monday on The Apron Thrift Girl *Make It Pretty Mondays * Sharing Sweet Mondays * Busy Mondays at a Pinch of Joy *Made Monday at Toastie Studio * *The Cure for the Common Monday * Craftastic Link Party * Brassy Apple, Make it Monday * Made By You Mondays * Skip To My Lou *
{T} *From Dream to Reality Link Party ** Thursday Linky Party at Osie Moats * Be Inspired by Elizabeth and Co. * Tutorials and Tips on Home Stories A 2 Z * I gotta try that * Off The Hook Link Party * The Winthrop Chronicles * Open Call Tuesdays on Salt Tree * Adventures of a DIY MOM * Take a look Tuesday at Sugar Bee Crafts * Blackberry Vine Tuesday To Do Party * Coastal Charm * My Uncommon Slice Of Suburbia * Tip Junkie
{W}*Riverton Housewives Round Up *In Bloom Link Party *Adorned from Above *Well Crafted Wednesdays *What I Whipped Up Wednesdays * Homemade by You Wednesday * Whimsy Wednesdays * Blue Cricket Design * The Fun In Functional * What I learned Wednesday * Home Happy Home * Someday crafts
{TH} * Delightful Order* A Glimpse Inside * The Crafty Blogstalker * Made In a Day * A Little Knick Knack * House of Hepworth's * 52 Mantels *
{F} * Pin Me Link Party*The Create and Inspire Link Party*Craftionary Link Party * Financial Friday Link Up with The Grant Life * Sharing Saturday
* The Chic and Crafty Party * Fab Not Drab Fridays * Shine on Fridays with One Artsy Mama * Friday Favs Party at Nap Time Crafters * French Country Cottage * Serenity Now * Tatertots and Jello * Chic On A Shoestring * Decorating
{Sat}*Your Great Idea, Or so She Says *Saturday Show and Tell *Saturday Showcase *Overflowing With Creativity *YOU Inspire Link Party *Be Different Act Normal * Nifty Thrifty Things * I heart naptime * The Sweet Talk Shop * Funky Junk Interiors * Twigg Studios *
{Sun} * Nifty Thrifty Things Sunday * DIY Showoff * The girl creative * By Stephanie Lynn * My 1929 Charmer Blog * Embellishing Life Everyday * Alderberry Hill * Homemaker On A Dime * Delectable Home * Everything Under The Moon *

Subscribe to:
Posts (Atom)