Showing posts with label what to do with your scrap fabric. Show all posts
Showing posts with label what to do with your scrap fabric. Show all posts
Monday, April 16, 2012
Hedgehog Taggie Tutorial
* If you don't want to make one of your own, I have now opened an Etsy shop and this little guy is one of the things I offer.
Supplies needed:
Fabric for the body {I used corduroy}
Brown Fabric for the head and feet {I used Flannel}
Scraps of pink fabric for the nose
Ribbons - different textures and widths
Fiberfill
Pins
Sewing machine
Needle and thread
Let's get started.
Using the pattern below, cut out the pieces of your hedgehog.
Line 1 piece of the body and 1 piece of the nose up together right sides facing in. With a seam allowance of 1/4 of an inch, sew the nose to the body. To provide a cleaner finish, open up the piece you just sewed and iron the seam open.
*Repeat for the 2nd piece of body and nose.
To create the nose, fold the pink fabric in half and roll it up. Pin the nose into place between the brown face pieces {which have now been sewn to the body}.
Cut out 8 hedgehog feet. Line them up, 2 sections together, right sides facing in. Sew the feet together leaving the top open. Turn the feet right side out.
Cut your ribbons {sorry, no picture}. I cut each ribbon into 4 inch sections.
Pin your hedgehog together:
1. Start by pinning along the seam where the head meets the body. You want to secure this seam in place so when the hedgehog is turned right side out, the seams of the head meet up as precisely as possible.
2. Make sure your nose is still securely pinned into place.
3. Pin your ribbons into place. Fold the ribbon in half and insert the looped side into the body. My loops are approximately an inch.
4. Pin the feet into place. I pinned the front two together and the back two together {on top of each other}.
Sew around your hedgehog, leaving the space between the feet unsewn. Turn your hedgehog right side out, through the space you left unsewn.
Generously stuff with fiberfill. Hand sew the opening closed with a needle and thread.
*Optional: Embroider in an eye. He looks just as cute with an eye as he does without an eye.
Done. Give him a little feel, he is guaranteed to feel better than a real hedgehog :)
* If you don't want to make one of your own, I have now opened an Etsy shop and this little guy is one of the things I offer.
©2011. For personal use only. Please do not use this tutorial for distribution or resale purposes. You are welcome to link back to this site. All borrowed content must be given proper credit. This is the intellectual property of While Wearing Heels.
Friday, March 23, 2012
Nesting Bags
Every spring, we find at least one bird's nest in our yard. And every year, baby birds fill our yard as they attempt to learn how to fly.
Maybe since Grace is growing up and I have no one to baby, this year, I am turning my maternal urges to the birds.
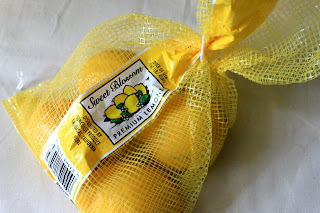
So, I grabbed some lemons. Birds like lemons, right? Seriously, though, I grabbed the lemons for the mesh bag which seemed like a perfect nesting bag for my feathered friends.
Nesting bags can be made of the following: pet hair {which we have ample amounts of}, thread, yarn, felt, batting and dryer lint.
So, I filled my mesh lemon bag {you could use a mesh onion bag as well} and hung it in one of our trees.
Wondering what I did with the lemons? I put them in iced water, poured myself a glass, sat back and waited for some birdies.
I just hope this turns out better than the last bird project I attempted. I had previously made bird seed ornaments and while they were setting up, a squirrel found his way into our screened in deck for a little snack and he couldn't figure out how to get back out.
If this project takes an unexpected turn, I suspect my husband will ban me from befriending birds.
Subscribe to:
Posts (Atom)


