Whether on the receiving end or the giving end of flowers, I have a quick and easy glass vase cover that will make any bouquet of flowers even more beautiful.
And perhaps more personal.
Gather the following supplies, to make your own glass vase cover: glass floral vase, scrap fabric (roughly 4 inches wide by 12 inches long), washcloth, *reusable freezer paper and a printer.
*To make reusable freezer paper: using spray adhesive, spray the paper
side (NOT the shiny side) of freezer paper and adhere it to a sheet of copy paper. Trim off
any excess freezer paper, leaving the finish size the same size as copy
paper (8 1/2 by 11).
Select an image or graphic.
The Graphic Fairy is a great source to find free graphics, which is where I found the image I used.
Print your image, running the copy paper through your printer,
shiny side of the freezer paper facing the ink cartridge. *If you are using an image with words, make sure you transpose or flip your image prior to printing.
If you skip this step, your image, once transferred will look something like this...
With a barely wet washcloth, dampen the area of the fabric you want to transfer your image onto. Flip your freezer paper over, centering your imagine onto the dampened fabric. Press firmly into the image, using either the back of your thumb or the back of a spoon, transferring the image onto the fabric.
And, just like that, you have successfully transferred an image onto fabric. Use a hot iron to heat set the ink.
You can finish your ends by attaching no-sew Velcro, gluing it or using some double sided tape to secure it closed. It all depends on how ambitious you are feeling.
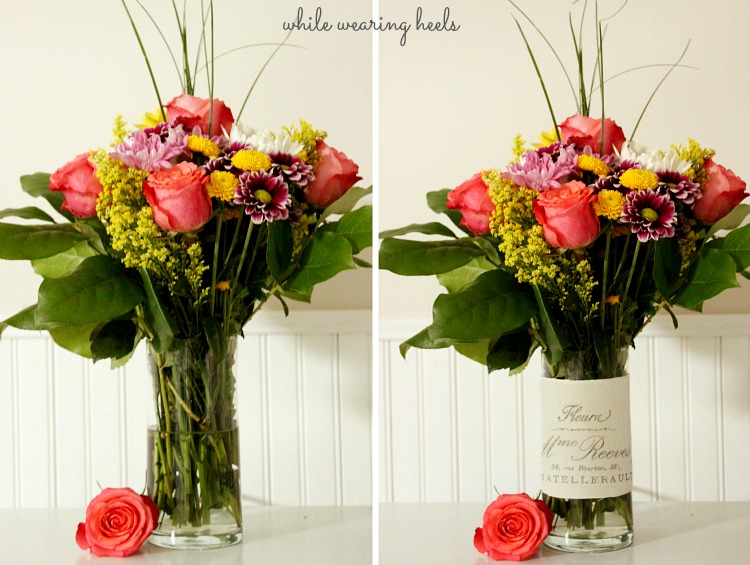
Find a naked glass vase and dress it up. It really does make any bouquet of flowers even more beautiful, doesn't it?
The best part of transferring images using freezer paper...you can just whip it clean and reuse it.
For similar projects check out my
lavender sachet, made using the same technique described above OR another
easy glass vase upgrade.
Originally shared at 'Or so she says...'