Showing posts with label personalized ornaments. Show all posts

Tuesday, December 3, 2013

Wood Silhouette Ornaments

A few weeks ago, I asked my Facebook followers for ornament inspiration.  In return, I promised a free ornament if inspiration struck.  'A Casarella quickly responded with the suggestion silhouettes. 

And, inspiration struck.

Instead of raiding my felt supply, I raided the woodaholic's collection of wood....those wood coaster he lovingly sliced, specifically.


To make your own silhouette ornaments you'll need, 10 minutes of free time and...

A log slice, some black vinyl (or chalkboard contact paper) and a print out of a good profile picture. 


Cut the profile picture out, taking care to cut with accuracy.  Place the printed cutout profile onto the log slice to determine if you need to size up or down or if you have the perfect size already.  When you get the size you want, trace the profile onto the back side of your vinyl and proceed to cut it out.


Peel the back off your vinyl.


Affix the vinyl silhouette to the center of your log slice.


Add an eyelet or drill a hole through the top of your log slice.

Attach ribbon or twine and hang.


These silhouette ornaments would also make adorable placecard holders.  Attach them to a clipping of rosemary then place them onto a dinner plate.  


These silhouette ornaments would also make great gifts for grandparents, friends and/or family.


Not only are these quick to make, whatever you decide to do with them, they will be a timeless and memorable ornament to treasure.

Thanks 'A Casarella for the inspiration (enjoy your ornaments)! 

Monday, December 17, 2012

Love Letter Ornament

*I share this post with a heavy heart.  Tomorrow I will be participating in a day of silence in remembrance for the victims lost to the tragedy in Newtown, CT.  If you are a fellow blogger, I encourage you to do the same.


Tuck away in a box, I have the letter my husband wrote to me the day that we got married.  Sadly, though, tucked away in a box, I rarely see it or appreciate it.  This year, I decided to turn it into an ornament.


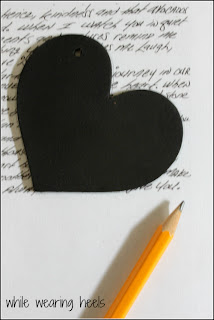
I scanned the original letter and printed it out on copier paper.  Using a wooden heart, I traced out the exact shape I needed.


Using some Mod Podge, I applied a coat onto the wooden heart and placed my paper heart on top.  After that dried, I applied another coat {a sealing coat} of Mod Podge over the top of the paper heart. 


I added a key, yes the key to my heart {cheesy?} and some twine to hang the heart from.


So, now instead of this beautiful letter being tucked away in a box, year after year, I can hang it on my tree and appreciate the happy memories that come flooding back.


And, yes, my beautiful letter referenced In N Out Burger...my sweet husband knows the way to my heart.


Link Party Websites

{T} * Be Inspired by Elizabeth and Co.   * Tutorials and Tips on Home Stories A 2 Z   * I gotta try that   * Tips and Tricks Tuesday at Stringtown Home  * Delicate Construction * The Winthrop Chronicles  * Open Call Tuesdays on Salt Tree * Adventures of a DIY MOM * Take a look Tuesday at Sugar Bee Crafts * Blackberry Vine Tuesday To Do Party Coastal Charm * My Uncommon Slice Of Suburbia  * Tip Junkie   

{W} *In Bloom Link Party *Adorned from Above * All Star Blogging Party *Well Crafted Wednesdays *What I Whipped Up Wednesdays * Homemade by You Wednesday * Whimsy Wednesdays  * Blue Cricket Design  * The Fun In Functional * What I learned Wednesday *   Home Happy Home * Someday crafts 

{TH} * Farm Girl Fest* Thursday Linky Party at Osie MoatsTaylor House ThursdayThursday's Temptation Link PartyDelightful OrderA Glimpse Inside  *  The Crafty Blogstalker * Made In a Day  * Somewhat SimpleA Little Knick Knack* House of Hepworth's * Chic on a Shoestring * 52 Mantels *
 

Friday, December 14, 2012

Barbie Ornament

In the ornament making sweat shop, I have admittedly been in this past month, I couldn't forget about making a special ornament for Grace.

While I make ornaments, I often multi-task by playing Barbies with Grace.  It seemed only fitting, Grace's ornament be a Barbie ornament.


Supplies Needed:
Felt
Batting or extra layer of felt {to fill your ornament with}
Black Embroidery Thread and Needle
Ribbon {for the ornament loop}
Water Soluble pen
And, the Barbie pattern,  which I had pinned from Frou Frou by Heathersue but no longer is up on her site, SO if you want to make one of your own, you can use the pattern I pinned.

Begin by tracing the Barbie pattern onto your felt. 


Using a stem stitch, embroider along the outline.


On the back of this ornament, I decided to embroider Grace's name with a TM and the date.  I wanted it to have a Barbie like feel to how I personalized it.  This is optional, the ornament is just as cute without anything on the back.


When you have finished your embroidery, cut your Barbie out.  I used a circle shape.  Cut the back out in the same size and the batting or extra layer of felt out in a slightly smaller circle. 


All that is left to do is assemble your ornament.  Fold your ribbon over into a loop, apply a generous layer of glue above the ribbon loop and below it as well as around the perimeter of the circle.


Place the batting or extra layer of felt down in the center of the ornament, making sure there is still plenty of glue left around to attach the top layer. 


Attach the top layer, let dry and then admire on your tree.


Tuesday, February 14, 2012

Heart Clay Ornaments

After my sappy 'Happy Valentine's Day' post from earlier, I decided to round thing up on a creative note with one final Valentine's day craft.


A friend sent me a link to Marie Grace Designs, specifically her clay ornament recipe. The recipe called for staples I already had in my pantry so I decided to try it out.


I grabbed my heart shaped cookie cutters {they certainly have gotten a lot of use lately - cookies, bird seed feeders}, my typewriter stamp set and I got busy creating.


The best part, when you are done creating you can just set it aside and forget about it while it sets up {I feel like Ron Popeil doing an infomercial for clay ornaments, just set it and forget it}.


They dry a bright white and have the delicate look of porcelain.


I've always been a fan of salt dough ornaments but now that I have tried this clay ornament recipe I am now a convert. Make sure you head over to Marie Grace Designs to get the recipe and have fun creating some ornaments of your own.
Related Posts Plugin for WordPress, Blogger...