Showing posts with label easter crafts. Show all posts

Friday, March 22, 2013

Specimen Art By Suburble

Looking for a quick, inexpensive fun project to get you in the mood for Spring?  Why not make an Egg-in-Nest Specimen Art piece.


Impressive Right? Sadly, I cannot take credit for this adorable project.  

The incredibly witty and very talented Tara, from Suburble, has graciously come to visit While Wearing Heels to share her Egg-in-Nest Specimen Art (which is one of many great projects  she has over at her new blog).

I guarantee she'll make you giggle.  

 
And, now, here is Tara and her Egg-in-Nest Specimen Art.


I was aimlessly wandering around the interweb the other day, and I came across a post on Balancing Home showing her spring mantle decor - featuring eggs in nests as specimen art. I loved the look, but Megan wrote that she had found her little nests on clearance - last year - at Target for $3. So I admired, bookmarked, and then said, "Well, unless Doc Brown drives the DeLorean onto my driveway, I guess that craft won't be happening this year!"


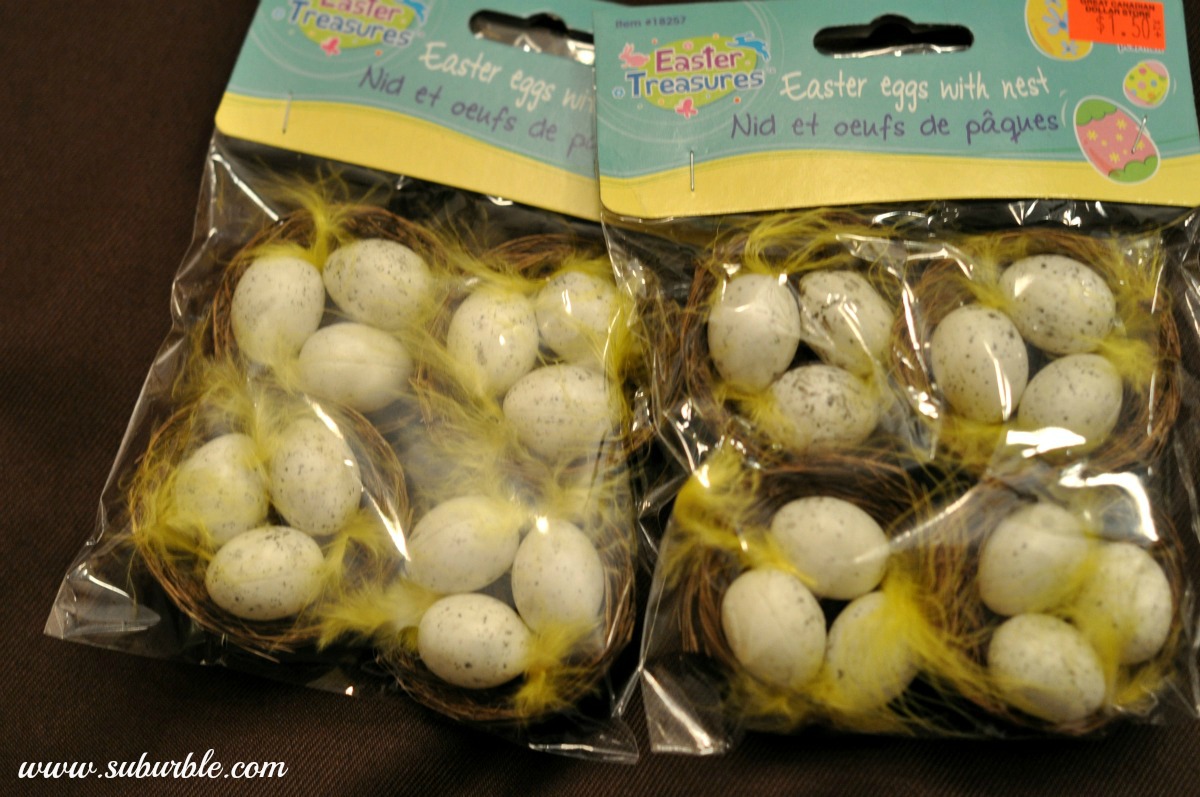
Then, I was strolling through the Dollar Store - like I do - and I came across these little beauties in the seasonal aisle. They were $1.50 (this particular dollar store has some things that are not just a dollar. Sigh.), but I picked up two packages. I can work with these! I feel craft-spiration coming on!


Then I opened them.

Holy crap. Is this where Big Bird's harem goes to lay their eggs? What kind of muppet atrocity is this?


Thankfully, the nests were easily "plucked". Ahhh... much better.


The original piece featured groups of eggs that were different colors (pink, blue, green). I looked at my speckled eggs and thought, "I can fix this!"

Because I didn't want the color to be opaque, I opted not to use my acrylic paints. Instead, I dug into the kids' craft supplies and came up with Crayola! I know - Martha could learn something from me, couldn't she?

Probably not.... but anyways...


I didn't really have a technique, per say. I painted with one color, and then dabbed on another color with a sponge brush. 


It requires a bit of trial and error. What's awesome is that because Crayola is washable, you can easily fix mistakes if you're a bit too heavy on one color.

And unless you have a pink paint handy, I wouldn't recommend trying out a red paint. I ended up creating something out of a vegan person's nightmare. Those eggs were promptly washed off.


I ended up with two bluish-green nests, which I quite liked. The sponge added a mottled quality to make the eggs look more realistic.

I attached the eggs to a piece of cardstock and matted it. They're attached with double-sided tape, and so far, so good! They're housed in the same frame that my It's Raining Hearts Valentine's Artwork was in. I just removed the glass in order to give it a shadow-box quality.


I'm quite happy with how it turned out! $3 in Dollar Store nests, perhaps $.10 in cardstock, and the rest was already kicking around the house! This could be a great kids' project (especially the plucking of scary feathers from the nest), but I did this project solo.

Oh! And a P.S. to this post: I understand why it is called "Specimen Art", but ugh, isn't the most unromantic way of describing it? I wish I was called "Collection Art" or something else a bit less "I'm going to dissect this in Biology class and try not to dry heave".

____________________________________________________________________________


I want to say a big thank you to the fabulous Amy for letting me crash her pad. She is an awesome lady (as I’m sure you’re all very aware of) and I am so honoured to have the opportunity to share my eggy craft with you all.

I invite you to pop over to my own blog, Suburble, and check out what sorts of hijinx we’re up to. In honour of my very first guest post, I’m offering a giveaway this weekend! 


Click over for the chance to win the Labelling Package O’ Your Dreams: 14 adhesive chalkboard labels, 14 blue adhesive vinyl labels and two chalkboard pens: one white and one silver! These labels are cut (by moi!) from indoor vinyl and are perfect for the pantry, the playroom, the craft room, your linen closet… you name it! The chalkboard pens will write on both colours of vinyl, and the greatest thing is that a little water on a cloth wipes them clean – you can write on them over and over again!

The giveaway closes at midnight, Monday, March 25th, and is open to American and Canadian residents. And because I’m a fledgling blog with a growing audience, your chances are quite possibly much greater to win!

I look forward to meeting you!  

Thank you so much Tara for visiting While Wearing Heels.  If you haven't already, go and visit her lovely blog, welcome her into the crazy world of blogging and leave her some comment love.

Friday, March 15, 2013

Carrot Boutonniere (or pin)

Easter accessories don't have to be just for girls.  This carrot boutonniere could be a delicious and dapper addition to any little boy's Easter outfit.


Want to make your own carrot boutonniere?

Grab the following supplies.


 Using your orange fabric, cut out a triangle shape.


Don't let this next step intimidate you, even though it requires using one of these.


Fold the orange fabric in half, right side facing each other.  Leaving a 1/4 of an inch seam allowance, sew down along the open side from the top to the tip of the carrot.  Turn your carrot right side out and fill with stuffing.


Using your needle and thread, 1/2 inch down from the open end, do a running stitch around the entire top of the carrot.  Tuck the excess fabric into the top of the carrot and pull the thread to loosely close the top.


Grab your ribbon and cut into 3 1/2-4 inch strips.  I used 8-9 loops per carrot.  Fold over and group as a cluster of loops.  *Tip:  use a glue stick to help secure your loops and create your cluster.


Place your ribbon loops into the top of the carrot, pull the running stitch string to tighten the loosely closed carrot top fully closed.  Run a few laterally stitches through the cluster of ribbon loops and carrot fabric to fully secure them into place. 


Add a little grosgrain ribbon around the stem for an extra spring touch.


Then pin it to the handsome little man in your life, or in this case, a fellow blogger's handsome little man.

Thrive 360 Living's sweet little boy.
Or just pretend to eat it.


Tuesday, March 12, 2013

Put A Pin In It - Easter Projects

Perhaps it's a mixture of being frugal and/or sentimental but I like to fill Grace's Easter basket with something homemade. 

Easter baskets of the past have included some of the following *pin*spriation.

A few multi-colored felt Bunny Finger Puppets shared by The Purl Bee. Not only are they these bunnies adorable, they are really easy to make. 


One year this  Bunny Bowling Set, shared by The Long Thread on Etsy How-Tuesday, showed up in Grace's Easter basket.


These bunnies are almost too sweet to try and knock over...almost.


My favorite *pin*spired Easter basket filler was made using Fiona Dalton's Rabbit Pattern


Her patterns are easy to follow, even for someone who is a novice at sewing.   


Though, not an Easter Basket filler, the Peeps Bunny Bunting from Made is my favorite Easter decoration.


Really, what's not to love.


I guarantee, if you decide to make your own bunting, you won't be able to stop with just one.


What has been your favorite Easter basket filler?  I need some *pin*spiration for this year.

Thursday, February 28, 2013

Jelly Bean Jewelry

Spring may not be in the air BUT Spring candy certainly is.  Spring candy in all its glorious bright and cheerful colors.  Colors that could be the perfect accessory, even to winter outfits.


Accessorizing is something we know all about so we decided to do just that and make colorful (and edible) bracelets...out of jelly beans!


Do you want to make your own delicious piece of jewelry?

Gather the following supplies:  jelly beans, string and a needle.


If you opt to make a bracelet, make sure you cut your string longer than you would expect, the jelly beans will take up more bendable space then you might think.


Push your needle through the jelly bean.

*This proved more difficult than I had expected.  Perhaps the generic jelly beans I bought were a bit stale?  Regardless, I heated my jelly beans up in the microwave for a few seconds (about 8) to soften them enough to get the needle through.


Continue stringing your jelly beans onto the string to the design and size of your liking.  When you're finished, tie it around your little fashionista's wrist.


  No matter how fashionable it is, the best part is eating it!


Monday, April 2, 2012

Bunny Barrette Tutorial


Supplies:
Pink Felt
White Mini Pom Pom
Glue
Needle and Thread
Barrette

Using the pattern below...


1. Cut out 2 bunnies. I hand sewed mine together but you could glue them together as well.
2. Glue on your tail {the white mini pom pom}.
3. Glue your bunny to a barrette.
4. Share it with some bunny you love.


Linked up and a big thanks to:

 Felt Food Roundup

Friday, March 30, 2012

Bunny Tail Tutorial

Looking for an easy craft even the kids can help with? Why not whip up some bunny tails.


Grab the following supplies:
Cotton balls {I used about 15}
Glue {Elmer's Glue or Tacky Glue}
String


Cut the string long enough to tie around your little one's waist.  Grab those cotton balls and begin to glue.  Glue the cotton balls to each other and then to the center of string.  The hardest part, wait for the glue to dry. 


Bunny tails, the perfect accessory for any Easter egg hunt.


Even Riley participated.


This was just for practice so when my little bunny realized her eggs were empty, I think she was disappointed.


But she certainly looked cute, wearing her bunny tail, collecting those eggs.

Thursday, March 29, 2012

100 Bunnies for Harrisburg

Ann at Suburban Prairie Homemaker has issued a Bonus Craftism Challenge that I am happily and humbly participating in. Ann is trying to gather 100 bunnies to be delivered to a church in Harrisburg, Illinois by Easter.

Harrisburg, Illinois was recently devastated by a tornado. This terrible storm left a path of destruction but it was apparently not devastating enough because FEMA has denied any assistance.

Far too often, I feel compassionate about a cause or a story but wonder, what can I do to make a difference. Well, thanks to Ann, today, I feel like I can do something to make a difference SO I put my posts and projects to the side and I started to make a bunny.


I used Fiona Dalton's Jack Rabbit Sewing Pattern. I always love to add my own personal touch, to anything I do, so this sweet little bunny got some pretty pink bows and a heart {because she was definitely made with a lot of love}.


I can't wait to wrap up my bunny and send her on her way. I am hoping the people in Harrisburg, Illinois will be reminded, they aren't alone.


If you want to join Ann's challenge, you can get the details here.

Linked up and a BIG thanks to:
HookingupwithHoH
Related Posts Plugin for WordPress, Blogger...