If you heart fake food and want to learn how to make your own felt pineapple, keep on reading.

You'll need to gather the following supplies: felt in green, gold and brown, needle and brown thread, a ruler, water erasable pen, scissors and fiberfill.

Using an entire sheet of gold fabric, draw a grid pattern with your ruler and water erasable pen. The grid does not need to extend all the way to the bottom of the felt. Leave approximately an inch, at the bottom of the felt, grid free.

Either using your sewing machine OR hand embroidering use brown thread to cover the grid you just drew.
*I opted to hand embroider using a stem stitch.

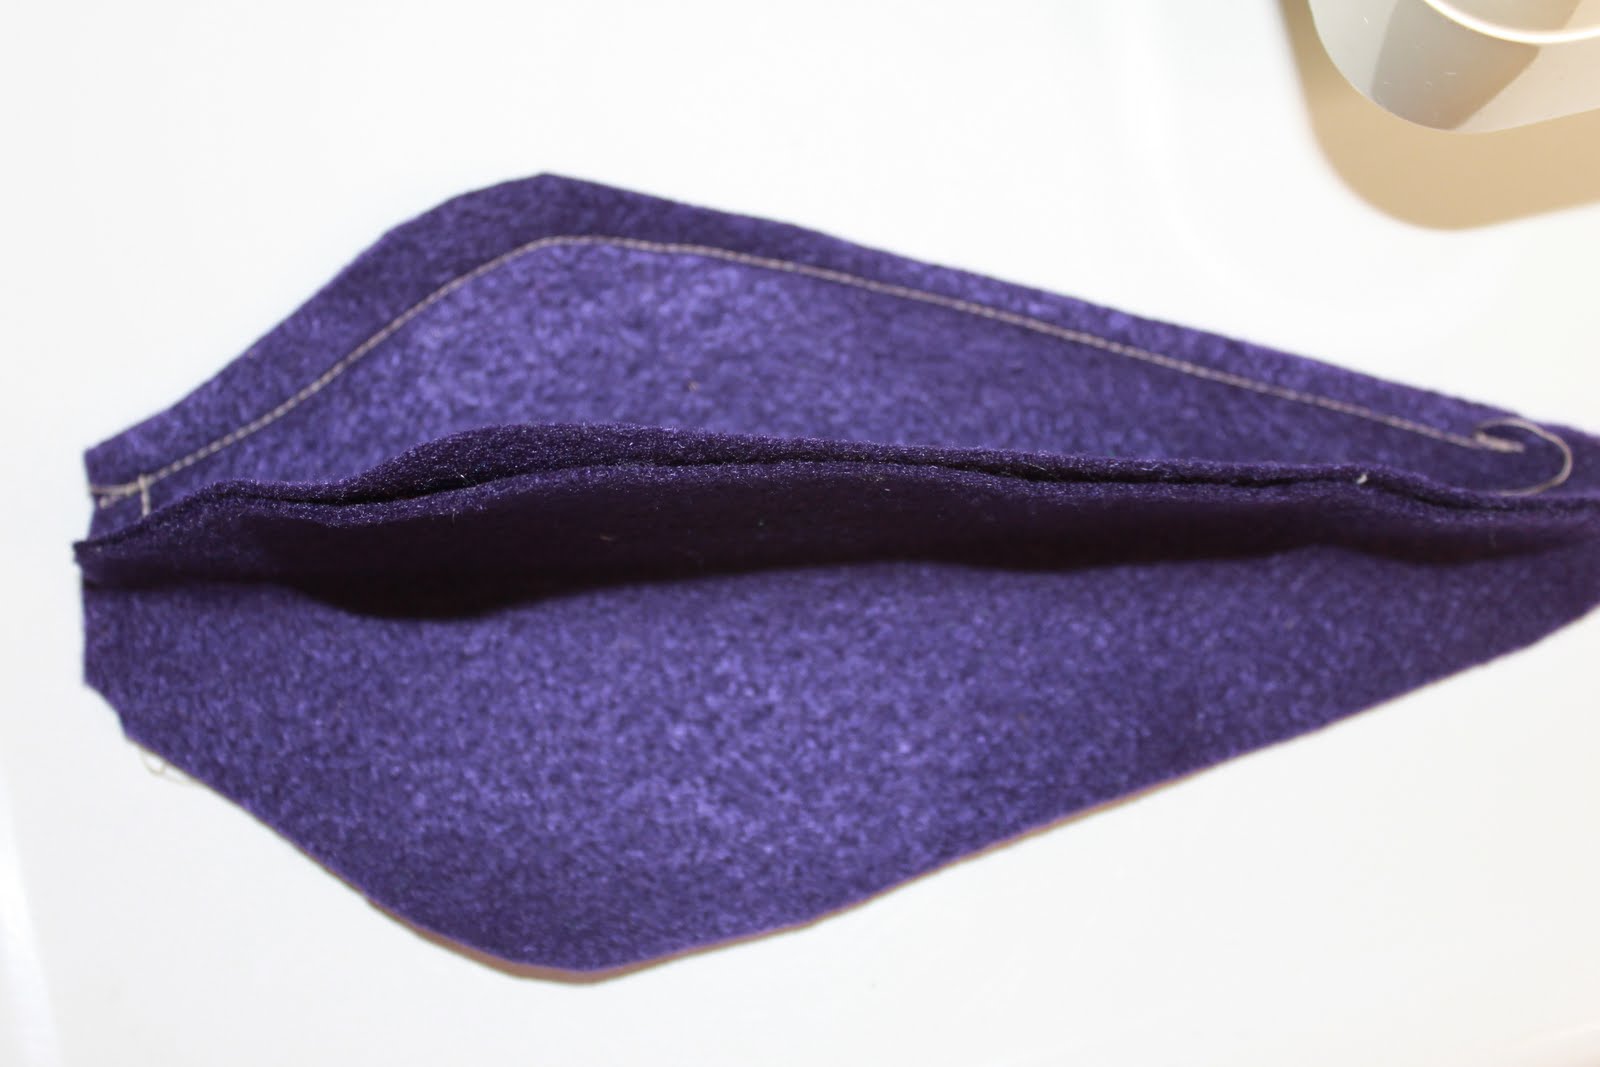
Fold the pineapple body in half, right side facing each other, and sew down the long side ending at the inch mark that is grid free.
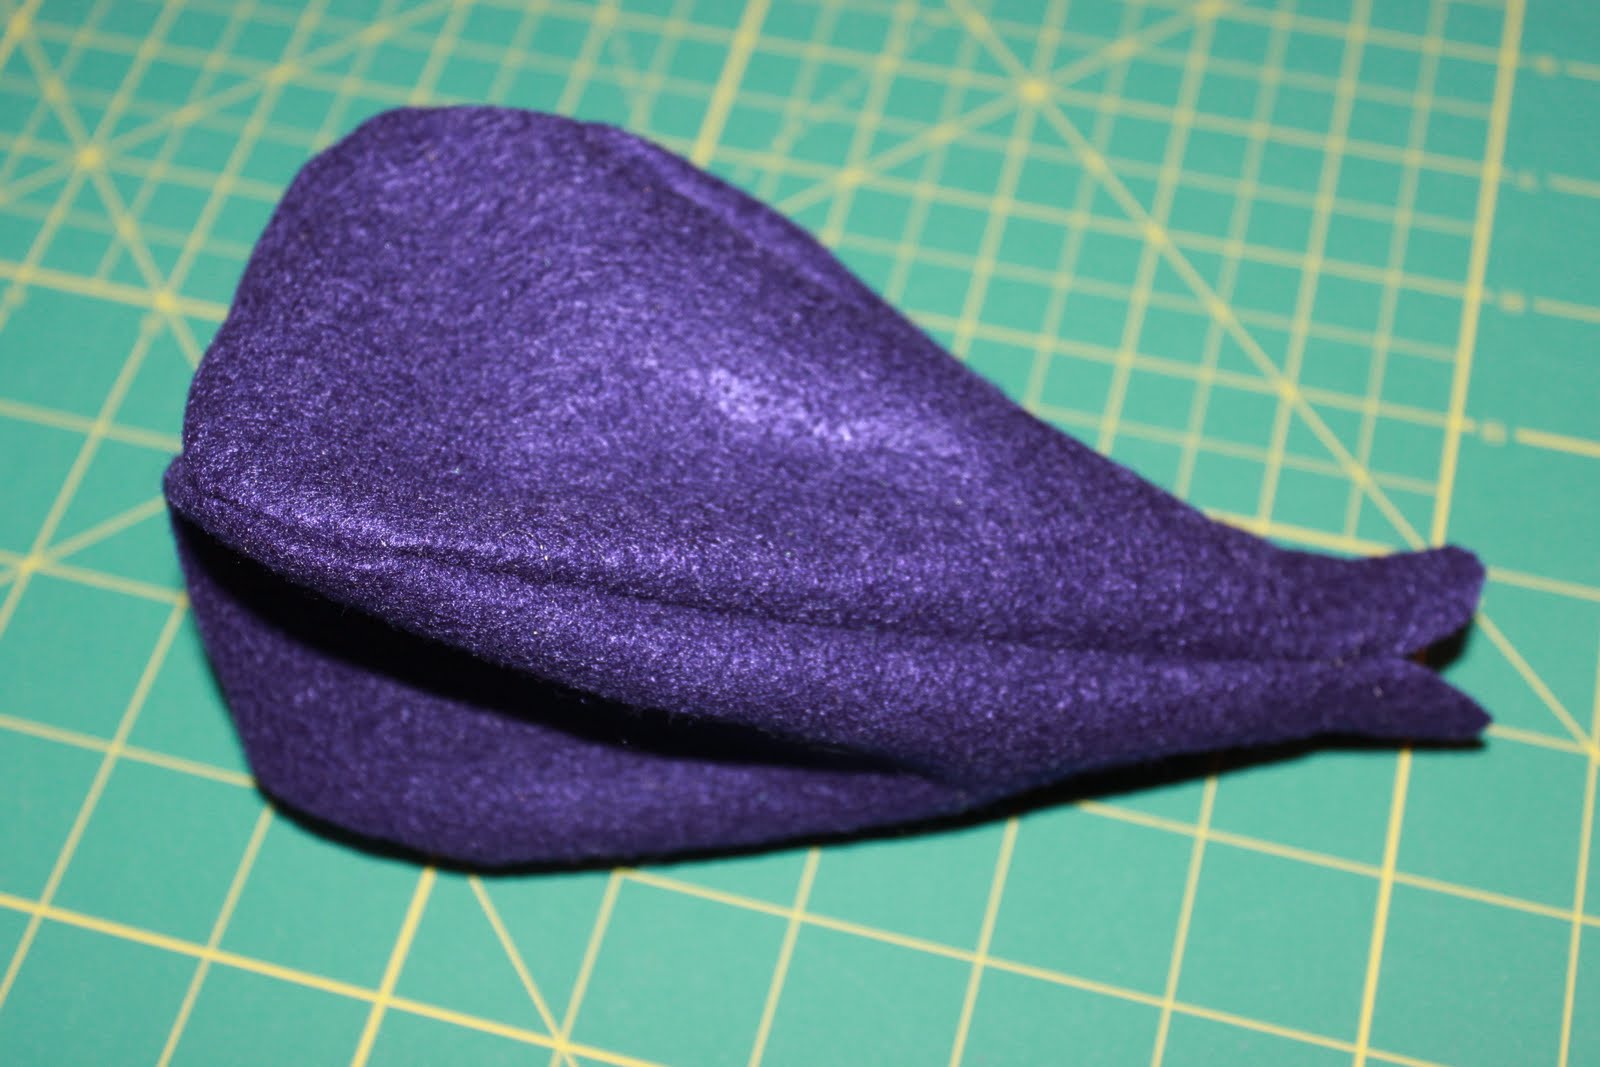
Along the grid free bottom inch section of your pineapple, cut 4 long thin triangle sections out. You'll need to make these cuts in order to fold the bottom sections over to close the pineapple.

Fold the bottom sections of the pineapple over. Either glue or hand sew the opening closed. You may need to adjust your cuts to get the fold to lay flat. *If you get your cuts right, you could also attempt to sew the cuts back together to close the bottom of the pineapple.
To give the bottom of your pineapple a more finished look (and to hide any gaps or puckers), cut out a small circle out of brown felt. Apply some glue to the bottom center of the pineapple and affix the brown circle into place.

Generously stuff your pineapple with fiberfill until you are about an inch from the top.

To create the stem of your pineapple, grab the green felt. Cut sections of felt with either 2, 3 or 4 points (it will resemble the shape of grass). Start with your section of 2 points and pinch them together. Wrap your section of 3 points around the center 2 points. Using your needle and thread (I used green thread), do a few stitches by hand to secure to stem pieces into place. With each new section of green felt, start slightly lower than the section before. You'll complete between 3 and 4 layers or sections before your stem is complete.

Cut small triangle shapes into the top of your pineapple, preferably not into any of the grid stitches you created. Fold the tops over so and begin to hand stitch the top of your pineapple closed using yellow thread. Do not close the top completely.
Insert the stem into the center of the pineapple and continue to stitch the top shut while stitching the stem into place.

Done.
Hopefully you heart your new pineapple.

If you liked this tutorial, make sure to check out my other I Heart Fake Food Tutorials.

Link Party Websites
{M}
*Watch Out Marta Mondays *Pink Hippo Party * Thrift Share Monday on The Apron Thrift Girl *Make It Pretty Mondays * Sharing Sweet Mondays * Busy Mondays at a Pinch of Joy *Made Monday at Toastie Studio * *The Cure for the Common Monday * Craftastic Link Party * Brassy Apple, Make it Monday * Made By You Mondays * Skip To My Lou *
{T} *From Dream to Reality Link Party ** Thursday Linky Party at Osie Moats * A to Zebra Celebrations Link Party Tuesdays* Be Inspired by Elizabeth and Co. * Tutorials and Tips on Home Stories A 2 Z * I gotta try that * Off The Hook Link Party * Delicate Construction * The Winthrop Chronicles * Open Call Tuesdays on Salt Tree * Adventures of a DIY MOM * Take a look Tuesday at Sugar Bee Crafts * Blackberry Vine Tuesday To Do Party * Coastal Charm * My Uncommon Slice Of Suburbia * Tip Junkie
{W}*Riverton Housewives Round Up *In Bloom Link Party *Adorned from Above * All Star Blogging Party *Well Crafted Wednesdays *What I Whipped Up Wednesdays * Homemade by You Wednesday * Whimsy Wednesdays * Blue Cricket Design * The Fun In Functional * What I learned Wednesday * Home Happy Home * Someday crafts
{TH} * Delightful Order* A Glimpse Inside * The Crafty Blogstalker * Made In a Day * A Little Knick Knack * House of Hepworth's * 52 Mantels *
{F} * Pin Me Link Party*The Create and Inspire Link Party*Craftionary Link Party * Financial Friday Link Up with The Grant Life * Sharing Saturday
* The Chic and Crafty Party * Fab Not Drab Fridays * Shine on Fridays with One Artsy Mama * Friday Favs Party at Nap Time Crafters * French Country Cottage * Serenity Now * Tatertots and Jello * Chic On A Shoestring * Decorating
{Sat}*Your Great Idea, Or so She Says *Saturday Show and Tell *Saturday Showcase *Overflowing With Creativity *YOU Inspire Link Party *Be Different Act Normal * Nifty Thrifty Things * I heart naptime * The Sweet Talk Shop * Funky Junk Interiors * Twigg Studios *
{Sun} * Nifty Thrifty Things Sunday * DIY Showoff * The girl creative * By Stephanie Lynn * My 1929 Charmer Blog * Embellishing Life Everyday * Alderberry Hill * Homemaker On A Dime * Delectable Home * Everything Under The Moon *