Showing posts with label felt fruit tutorial. Show all posts

Tuesday, April 24, 2012

Farmer's Market

Thanks to Ana White and her free and easy to follow farmer's market plans, we made Grace one of her own for her 2nd birthday. Of course, my husband took liberties with the design and made Grace's market bigger. Bigger is better right? That is, unless you have to fill it with fake foods :)


When we gave Grace her market, I had made roughly 40 felt fruits and veggies AND it barely made a dent. I swore I would never make another fake food again.  Never say never, right?


Along came my blog and the need to create posts SO I got to work making more fake foods and documenting the process. 


Believe it or not, I still have a few more I heart fake food tutorials on my list to complete.


In the end, I guess I don't mind that I have been the sole worker in my 'I heart fake food' sweat shop, since Grace loves her one of a kind farmer's market.


Bonbon Break

Monday, April 23, 2012

I Heart Fake Food - French Bread Tutorial

In case there have been any questions...yes, I still heart fake food.


If you still heart fake food as well, go grab the following supplies:

Tan and Cream Felt
Fiber Fill
Straight pins
*both hand sewing and machine sewing required

There is no pattern. Simply cut {2} 5 inch x 15 inch pieces of tan felt {you'll need to buy felt from a bolt, the sheets of felt won't be long enough} and {1} 5 inch x 12 inch piece of cream felt.

To give your bread some dimension you'll want to cut 3 sections across {1} piece of tan felt.  I used a water soluble pen to act as a guide for where I wanted to make my cuts.  When your 3 sections have been cut out,  pin the cream felt to the back of the tan felt.  Then either hand sew or machine sew around the cutouts.  I opted to hand sew.


Pin the side with the cutouts to the remaining piece of tan felt.  Sew around the French bread, leaving a 2 inch opening on one of the ends.  Turn the French bread right side out and stuff with fiberfill.  Using a whip stitch, sew the opening closed.


And there you have it, gluten free, carb free French bread.


If you are curious how Grace's farmers market looks, filled with all the 'I heart fake foods' I've made, come back tomorrow and check it out.

Until then, make your way through the rest of the I heart fake food tutorials here.


Friday, January 27, 2012

I Heart Fake Food - Felt Apple Tutorial


Gather the following Supplies:
Red, green and brown felt
Fiberfill
Scissors
Needle and thread {green, red and brown}
Sewing machine
Glue

Using the pattern below {copy and paste it into word to enlarge, the apple body is approximately 3 1/2 inches long}.


Cut the apple pieces out of felt.


Starting with two of the four pieces, begin sewing one side together starting a 1/4 of an inch down from the top. Continue until all 4 of your pieces have been sewn together. When all 4 sides are sewn together, you may want to sew across the bottom, to make sure your seams are sewn shut.


Turn the apple right side out.


Generously stuff the apple with fiberfill. No need to worry, I am not running a 'I heart fake food' sweat shop. The assistance I got was short lived.


I rarely change the color of thread on my sewing machine so occasionally you'll notice some exposed seams. Using your needle and thread, you can do a few stitches to close up any exposed seams. This will only take a minute or two at most. While closing up any exposed seams, begin to close in the opening as well {do not close it completely, you need a small opening to insert the stem and leaf}.


To create your stem, tightly roll up the brown rectangle piece of felt you cut. With your needle and brown thread, sew the stem shut. *Optional: with your needle and green thread, embroider veins onto your green leaf.


Insert the stem and green leaf in the opening left in your apple. Using your needle and red thread, sew the opening of your apple completely shut, sewing the stem and leaf in as you go.


I am all about finishing touches, I'd like for the bottom of my apple to look as good as the top. If you feel the same, cut a small circle out of brown felt {the same color you used for the stem}, apply a dab of glue where the seams meet and cover with the brown circle of felt.


Ta da...


How do you like them apples?


If you enjoyed this tutorial and want to see more...simply, click here.


Friday, December 2, 2011

I Heart Fake Food - Felt Pear

On the first day of Christmas my true love gave to me, a partridge in a pear tree. I am not sure technically what the first day of Christmas actually is BUT it seems like a perfect day to make some pears.


Supplies:
Green and brown felt
Fiberfill
Crafting glue
Needle and thread

Using the pattern below, cut all the pieces out of felt.


To create the body of the pear:


Arrange 2 pieces of the body of the pear together.


Start sewing from 1/4 of an inch down from the top of one side all the way to the bottom of the same side. {The top is where we will leave our opening for filling}


Arrange in the 3rd side of the pear, again attaching it by sewing from the top to the bottom.


Conclude by sewing the fourth and final piece into place.


The top of your pear should remain open, the bottom should be sewn shut.


When all sides are sewn together, your pear will look like this.


At the bottom of the pear, you may notice a bit of a gap.


Sew a straight line across the bottom, closing up the gap.


Trim off excess.


Turn your pear right side out.


Generously fill with fiberfill.


Apply a dab of glue to the bottom of your pear.


Attach the brown circle of felt to the glue.


To create your stem:


Tightly roll up the brown square of felt from the pattern. Using a needle and brown thread, sew the seam on the stem shut.


Insert the stem into the opening of your pear.


With a needle and thread sew the top of your pear shut. In the process, secure the stem into place.


Optional: to give your pear more shape, you can add some dimples where your pear begins to narrow at each side.


And there you have it.


From top to bottom...


I think these are the perfect pair.


If you enjoyed this tutorial and want to see more,simply click here.


Friday, October 14, 2011

I Heart Fake Food - Felt Eggplant Tutorial


Supplies needed:
Dark purple and Green Felt
Fiberfill
Green thread and needle
Fabric glue
Pattern below {which can also be downloaded here}


Using the eggplant pattern, cut out all felt pieces.


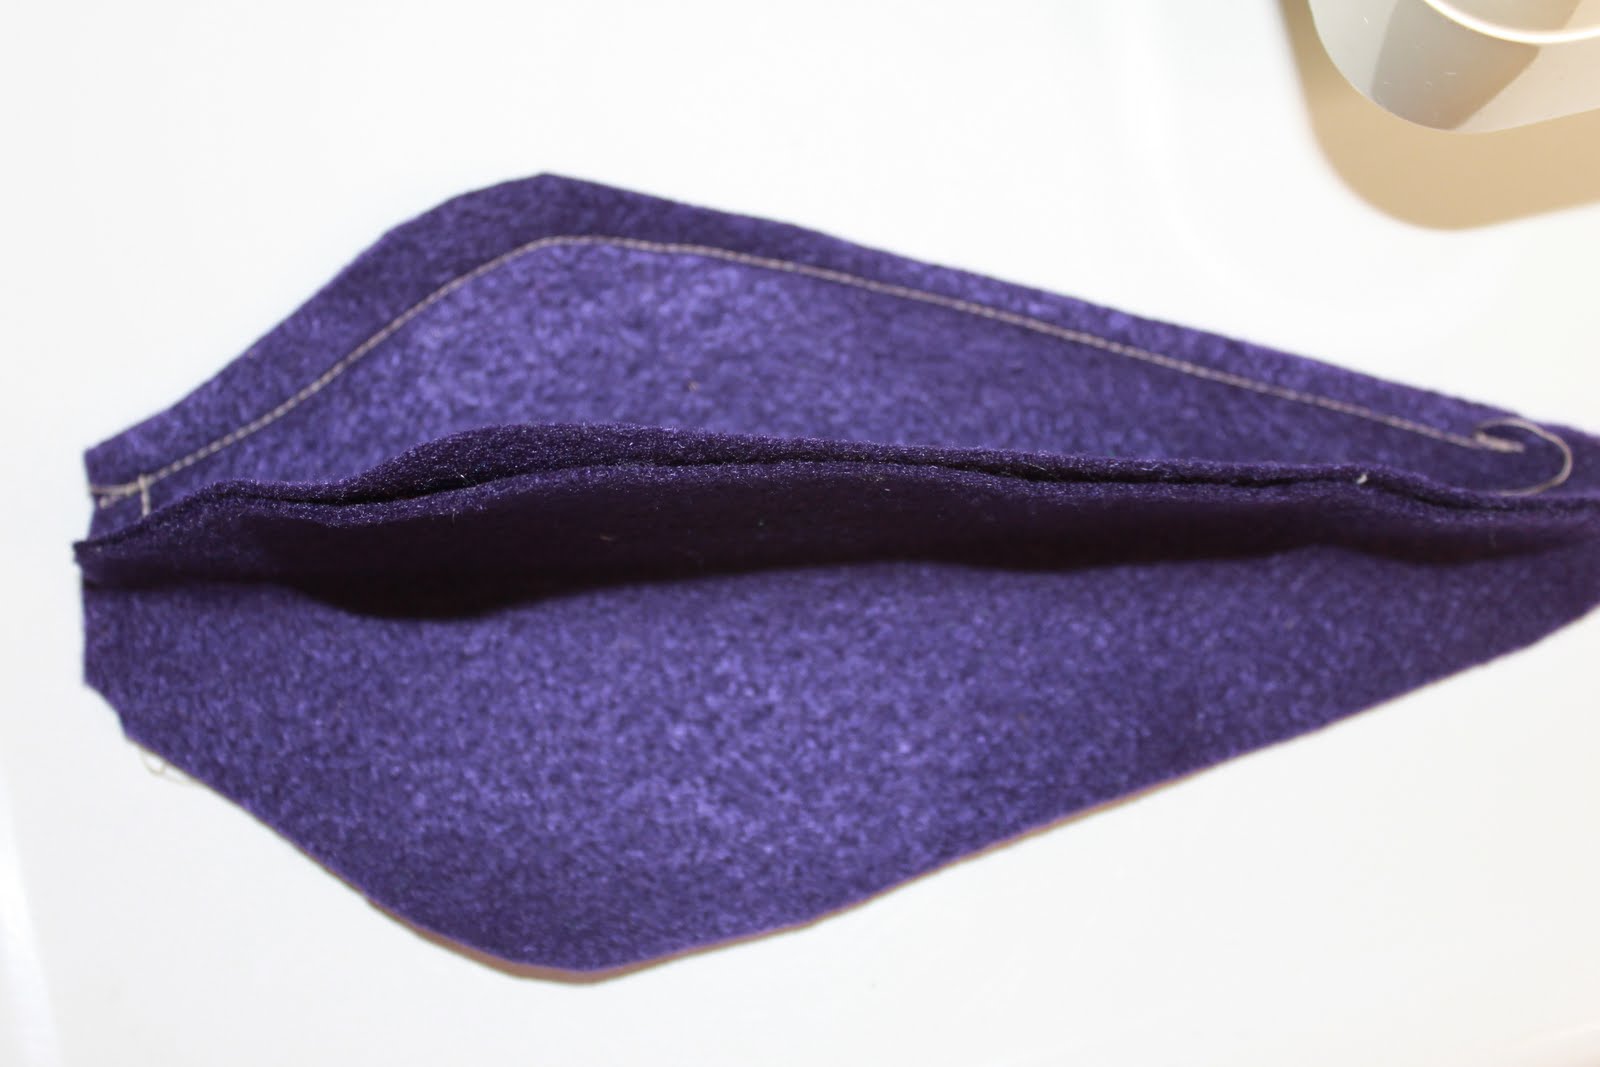
First, arrange 2 sections of the eggplant body together. Sew one side closed. Only sew half of the bottom of the eggplant closed. With each section, you'll continue to sew half of the bottom, until the entire bottom is fully closed shut. Leave 1/4 of an inch, at the top, unsewn. You will eventually turn your eggplant right side out through the top of the eggplant.


The first sewn side should look like this.


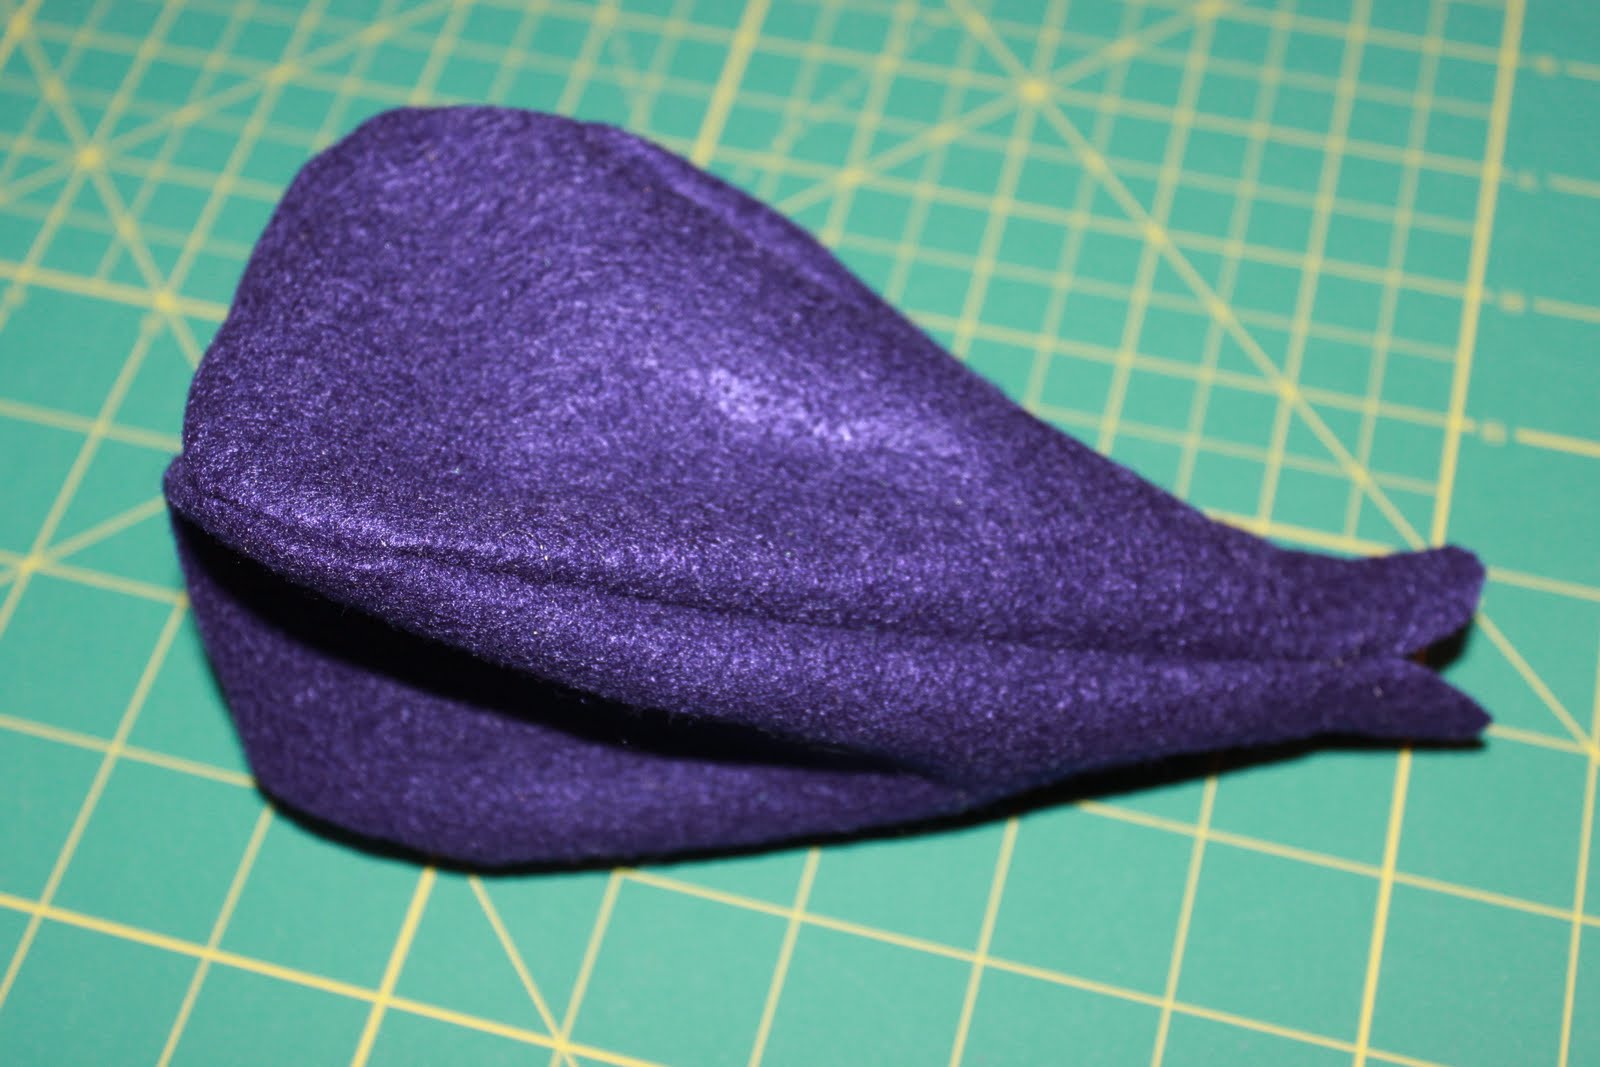
Next, line the 3rd section of eggplant body up along the open side of the 2 sewed pieces.


Sew from the top down on only one side, again, remembering to leave 1/4 of an inch unsewn at the top.


Arrange the final piece of the eggplant body, lining it up to meet the 2 remaining unsewn sides.


Sew down one side and then down the final side.


When all 4 sides are sewn together, there should only be an opening at the top of the eggplant.


Turn the eggplant right side out.


Generously stuff with fiberfill.


Using your needle and green thread {if you prefer, you could use purple thread} sew the top shut. No need to worry about sewing it shut perfectly, this will be covered with the eggplant topper.


Pinch the center of the topper. This will give you an idea of where and how you'll start to develop the stem of the topper. Pull the needle and thread, used to close up the eggplant top, through to where you pinched the top.


Continue pinching and tightly sewing the center of the topper to form a knob shape. As you are creating the stem, you will also want to add a few stitches to secure it to the top of the eggplant body.


Continue sewing and creating the stem until you get something similar to this...


Fold in the corner of the leaves on the topper.


Pinch the corners closed with your fingers.


Sew the pinched corners closed, grabbing some of the eggplant body as you sew. *Repeat for the other 2 corners.


Create a pucker in the top of the leaf. Using your needle and thread, come up from the eggplant body, through the leaf and then back across and through the body to the other side of the leaf, pulling the thread taunt creating a puckering effect. *Repeat for 2 remaining leaves.


Create a similar but smaller pucker at the bottom of the leaf. This not only creates a pucker but also attaches the leaf to the body of the eggplant. *Repeat for 2 remaining leaves.


Grab some glue, the green button bottom and your eggplant.


Center the green button on the bottom of the eggplant, securing it with a dab of glue.


Turn it back over and admire...you are done!


As Buddy The Elf would say, 'that's a very nice eggplant, it's very purply'.


Make sure to check out my other felt food tutorials as well.

Linked up and a big thanks to:
Felt Food Roundup
 
Related Posts Plugin for WordPress, Blogger...