Showing posts with label usa. Show all posts

Thursday, July 18, 2013

Hand Embroidered USA Quilt - Big Reveal


Finally, the hand embroidered USA is finished.


AND...has beautifully been turned into a quilt by none other than the Queen of Quilts herself, my mom.


In her very capable hands and her professional long arm quilting machine, she stipple quilted a tight and detailed free motion design...


around the entire United States, into each detailed groove of each detailed state.


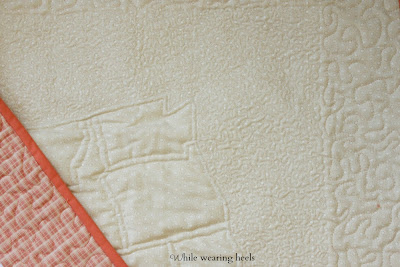
When you turn the quilt over, you can appreciate the detail she was able to achieve.


  She even precisely quilted around each of the states.


And, again, I am left in awe that the Queen of Quilts was able to take my hand embroidered USA...


And turn it into another beautiful quilt.


 Yes, another...this is my second USA quilt


We shall see if I get inspired to make a 3rd next year.

Both USA Quilts are for sales in the While Wearing Heels Etsy shop, along with other handcrafted items.

Monday, December 3, 2012

United States STATE Ornaments


These 'United States STATE Ornaments' were inspired by the United Scraps of America Quilt I made earlier this year.


This project, though, was much quicker!

You can make a state ornament for where you've traveled, where you were married or where you child was born. 


The possibilities are endless.

To make some of your own, gather the following supplies:

White Fabrics and Solid Colored Fabric
Batting
Ribbon
Water Soluble Pen 
Ultra Hold Heat-n-Bond
Traceable Mirrored Image of States

To get started, decide what state or even country you want to create.  Trace the mirrored image of your state onto Heat-n-Bond.  Iron the Heat-n-Bond onto the back side of the colored fabric.  Using sharp scissors cut the image out.


Place the image you just cut out onto the white fabric.  With your water soluble pen, trace around your image making it approximately 1/4 of an inch bigger all around.  Cut 2 pieces out of white fabric and one out of batting.  Pin the 3 pieces together with the ribbon loop inserted between the 2 white pieces of fabric.


Sew around the perimeter of the state shape.  Leave about a 1 inch gap unsewn.

Turn the state right side out through the unsewn gap.  Push the raw edges of your gap inside the shape and top stitch closed.  Remove the backing from the Heat-n-Bond on your colored fabric.  Place the colored fabric onto the white ornament and iron it into place.


And, just like that, you have the Sunshine State. 


Once you get started, I guarantee you won't want to stop.


And be sure to check out my other Christmas inspired posts:

Star Wars Ornaments
DIY Pottery Barn Candle
DIY Advent Calendar
DIY Santa Beard
Christmas Flower Boxes
Pine Needle Gift Tags
Pucker Up Ornament

Linked up to:


Related Posts Plugin for WordPress, Blogger...