A perfect accessory for little girls...
And big girls too.
Want to make one? Gather the following supplies:
Scrap Fabric *I used silk for the cream flower, cotton for the grey flower and polyester blend for the purple flowers
Scrap piece of felt
Scissors
Needle and thread
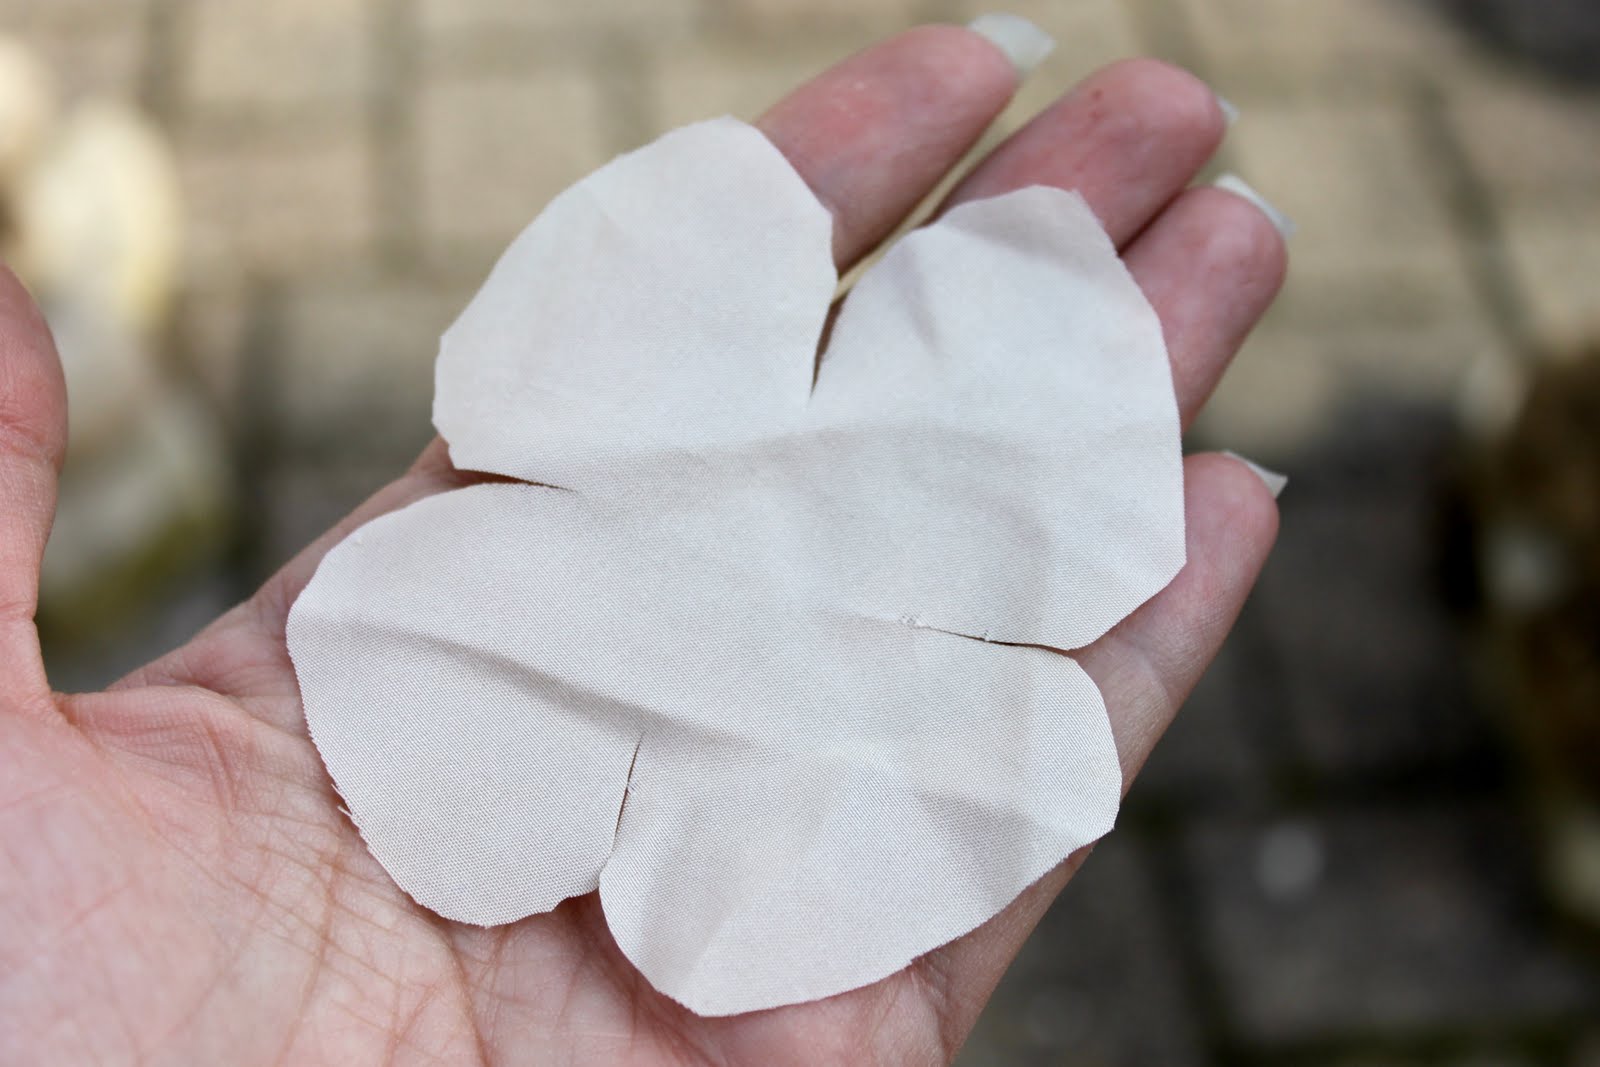
Cut out roughly 20-30 circles {about 3 inches in diameter}. They do not need to be perfect, as you can see from the circle I cut below.
Fold your circle into fourths and cut the sides {cut down towards the center but not all the way through}.
When still folded in fourths, cut the corners so they take a rounded appearance.
Then, unfold your fourth of a circle and it should look like a flower.
Repeat 20-30 times.
Attach a round piece of felt {approximately 1 inch in diameter} to the back center of one flower.
Pinching your next flower petal closed
Start to sew it to the front of your flower, starting in the center.
Repeat with the rest of the flower petals, working from the center out, adding enough to get the size and shape you want your corsage to be. When completed, add a pin to the back and start to accessorize.
Though I love the cream colored corsage, my favorite is the purple corsage. The big difference between the cream corsage and the purple corsage, the material. The cream corsage was made out of silk, the purple was made out of a polyester blend.
The edges of polyester blend can be seared to give your flower a more realistic organic shape. The trick is to bring the polyester blend close to the flame NOT into the flame. The heat from the flame will melt the edges of the polyester.
I used this technique in my very first post for a Flower Brooch and or Barrette Tutorial. You can see the difference between the silk flowers {which you can NOT sear, it will burn, not sear} and the polyester flowers.
This really is a quick and fun afternoon craft. Have fun accessorizing!
*If you do decide to sear your flowers, use great care and attention to detail. Do NOT try and sear cotton or silk fabric. I have only had success in searing a polyester blend.
Showing posts with label flower tutorial. Show all posts
Monday, January 16, 2012
Thursday, October 6, 2011
A Rose Is A Rose Tutorial - Part 2
A Rose Is A Rose Tutorial
Part 2 How to make the stem.
Again, in the spirit of reusing and repurposing I used an old valance to make the stem. You can use any velvet-like material.
You will also need some paper stem wire, I purchased a package from Joann Fabrics for $1.99.
Cut out a strip 20 inches long by 2 inches wide. The strip should be a few inches longer than the wire insert.
Fold over {velvet facing in} and pin to make sewing easier.
Sew the length of the strip and sew closed one end.
Turn the material right side out. This is the most challenging, since there isn't a lot of room to work with. I used a safety pin but it still proved challenging.
Initially I thought one wire would fit snug and secure inside the stem but instead I needed 2. I braided two pieces of wire together. Depending on how wide your stem is, you may need to fill it with more than 1 wire or even stuff it with some pipe cleaners.
Insert wire(s) into the stem.
Using this pattern, cut out 2 leaves from the same green velvet-like material.
Sew them together, leaving an opening to turn the right side out.
Using some green thread and a needle...
embroider veins to each of the leaves. The same effect could be achieved with your sewing machine. I didn't have green thread for my sewing machine so I had to embroider my veins.
Attach the smaller leaf to the back of the flower using your green thread and needle. I placed the bottom of my leaf roughly in the center of the flower, leaving the top of my leaf peaking out a side of the rose. Take care to sew it down cleanly trying to hide your stitches as you go.
When you have attached the smaller leaf, your rose should look like this...
Next, begin to give some shape and form to the stem. Start by tightly rolling up the very end of the stem. Roll the end approximately 2 or 3 times. You should get a result that looks like this...
Now to add some shape to the middle of stem. While resting your index finger on the middle of the stem, wrap the stem around your finger 2 times. Depending on how pliable your wire inserts are, you may need to adjust these twists to achieve the desired shape.
As you may have learned from sewing both your rose and the stem, this material shifts and moves. When you get the shape of your stem, pull the material up, like you were pulling up a pair of socks, so any slack or excess material is pulled up to the top. You will have extra material that goes beyond the wire insert.
Determine where you want to sew your larger leaf. Turn the raw edge of the leaf inside the body of the leaf. Using a needle and green thread, cleanly and securely attach the leaf to the stem. You should be able to do this by inserting your needle at the edge of the leaf pulling it through the stem and back to the opposite edge. You'll want to secure the middle of the leaf as well. Try and hide your stitches, using a velvet-like material, this should be easier than you might imagine.
When your leaf is securely attached, it should look like this...
The top of the stem should have a few inches of excess material. You'll want to use the excess to create a bud-like shape for your rose to blossom from {or rest on top of}. Wrap the excess material around the top of the stem. If need be, you can build up the bud by cut an extra strip of fabric, no more than 1/2 an inch in width, you will not need to sew this piece, simply fold it over, velvet sides facing out, and continue to wrap the top of the stem. Using your needle and green thread, do a few stitches to secure the bud in place. As you can see, the top of my stem is not perfect BUT it will be covered when attached to the bottom of the rose.
Place the top of the stem, with all the ugly raw edges directly against the bottom of the flower. Rough placement should be centered on the bottom of the flower, covering the end of the leaf.
You'll want to make sure you securely sew the stem to the flower. With your needle and green thread, sew around where the top of the bud meets the rose. As you attach it, you can shift your flower with the tightness and location of your stitches in order to have it face to a side or straight up. My rose faces to the side. Again, this is really what you think looks best.
When the stem is securely attached to the flower...
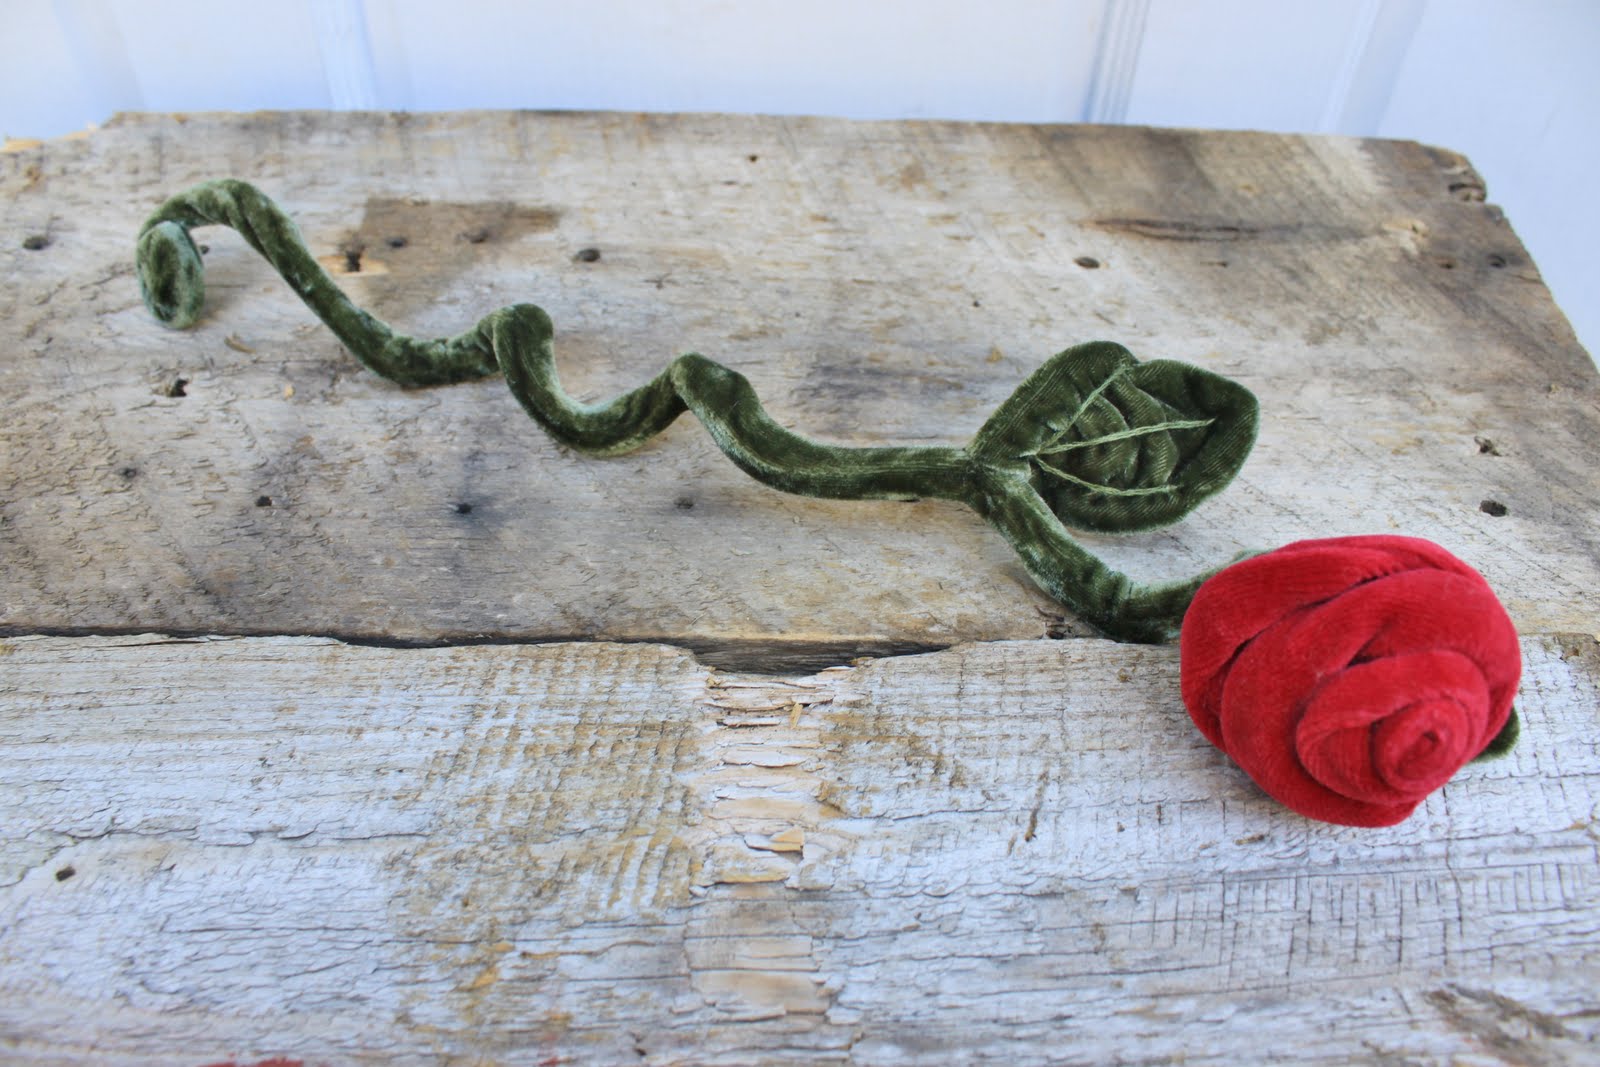
you have successfully completed the 'A Rose Is A Rose Tutorial'.
Find a spot to your show off your rose...
and admire.
As promised, this is a rose for any season {no green thumb required}.
Total cost for this rose:
$1.49 for the Goodwill Christmas outfit I turned into the bud of the rose
$1.99 for the floral stem wire
$0 for the old valance I already had
So, for under $5, I have a one of a kind rose.
©2011. For personal use only. Please do not use this tutorial for distribution or resale purposes. You are welcome to link back to this site. All borrowed content must be given proper credit. This is the intellectual property of While Wearing Heels.
Part 2 How to make the stem.
Again, in the spirit of reusing and repurposing I used an old valance to make the stem. You can use any velvet-like material.
You will also need some paper stem wire, I purchased a package from Joann Fabrics for $1.99.
Cut out a strip 20 inches long by 2 inches wide. The strip should be a few inches longer than the wire insert.
Fold over {velvet facing in} and pin to make sewing easier.
Sew the length of the strip and sew closed one end.
Turn the material right side out. This is the most challenging, since there isn't a lot of room to work with. I used a safety pin but it still proved challenging.
Initially I thought one wire would fit snug and secure inside the stem but instead I needed 2. I braided two pieces of wire together. Depending on how wide your stem is, you may need to fill it with more than 1 wire or even stuff it with some pipe cleaners.
Insert wire(s) into the stem.
Using this pattern, cut out 2 leaves from the same green velvet-like material.
Sew them together, leaving an opening to turn the right side out.
Using some green thread and a needle...
embroider veins to each of the leaves. The same effect could be achieved with your sewing machine. I didn't have green thread for my sewing machine so I had to embroider my veins.
Attach the smaller leaf to the back of the flower using your green thread and needle. I placed the bottom of my leaf roughly in the center of the flower, leaving the top of my leaf peaking out a side of the rose. Take care to sew it down cleanly trying to hide your stitches as you go.
When you have attached the smaller leaf, your rose should look like this...
Next, begin to give some shape and form to the stem. Start by tightly rolling up the very end of the stem. Roll the end approximately 2 or 3 times. You should get a result that looks like this...
Now to add some shape to the middle of stem. While resting your index finger on the middle of the stem, wrap the stem around your finger 2 times. Depending on how pliable your wire inserts are, you may need to adjust these twists to achieve the desired shape.
As you may have learned from sewing both your rose and the stem, this material shifts and moves. When you get the shape of your stem, pull the material up, like you were pulling up a pair of socks, so any slack or excess material is pulled up to the top. You will have extra material that goes beyond the wire insert.
Determine where you want to sew your larger leaf. Turn the raw edge of the leaf inside the body of the leaf. Using a needle and green thread, cleanly and securely attach the leaf to the stem. You should be able to do this by inserting your needle at the edge of the leaf pulling it through the stem and back to the opposite edge. You'll want to secure the middle of the leaf as well. Try and hide your stitches, using a velvet-like material, this should be easier than you might imagine.
When your leaf is securely attached, it should look like this...
The top of the stem should have a few inches of excess material. You'll want to use the excess to create a bud-like shape for your rose to blossom from {or rest on top of}. Wrap the excess material around the top of the stem. If need be, you can build up the bud by cut an extra strip of fabric, no more than 1/2 an inch in width, you will not need to sew this piece, simply fold it over, velvet sides facing out, and continue to wrap the top of the stem. Using your needle and green thread, do a few stitches to secure the bud in place. As you can see, the top of my stem is not perfect BUT it will be covered when attached to the bottom of the rose.
Place the top of the stem, with all the ugly raw edges directly against the bottom of the flower. Rough placement should be centered on the bottom of the flower, covering the end of the leaf.
You'll want to make sure you securely sew the stem to the flower. With your needle and green thread, sew around where the top of the bud meets the rose. As you attach it, you can shift your flower with the tightness and location of your stitches in order to have it face to a side or straight up. My rose faces to the side. Again, this is really what you think looks best.
When the stem is securely attached to the flower...
you have successfully completed the 'A Rose Is A Rose Tutorial'.
Find a spot to your show off your rose...
and admire.
As promised, this is a rose for any season {no green thumb required}.
Total cost for this rose:
$1.49 for the Goodwill Christmas outfit I turned into the bud of the rose
$1.99 for the floral stem wire
$0 for the old valance I already had
So, for under $5, I have a one of a kind rose.
©2011. For personal use only. Please do not use this tutorial for distribution or resale purposes. You are welcome to link back to this site. All borrowed content must be given proper credit. This is the intellectual property of While Wearing Heels.
Wednesday, October 5, 2011
A Rose Is A Rose Tutorial...Part 1
Interested in learning how to make a rose for any season, no gardening shears required?
A Rose Is A Rose Tutorial...Part 1
How to Make the Rose
Would you believe that I made my rose out of a $1.49 Goodwill outfit?
Supplies: Any sort of velvet-like material could be used. You'll need enough material to cut an 18 inch long by about 4 1/2 inch wide strip. Red thread and needle and a sewing machine.
When you have your piece cut out, fold it in half {velvet facing in}.
Starting from one of the ends, sew from the fold on an angle to the open edge and then continue to sew up the length. Use a 1/4 of an inch seam allowance. *This fabric stretches and can be difficult to sew. Pinning makes will make it easier.
Trim the excess off of the angled end.
Turn the material right side out.
Tuck the angled tip back into the body squaring it off again.
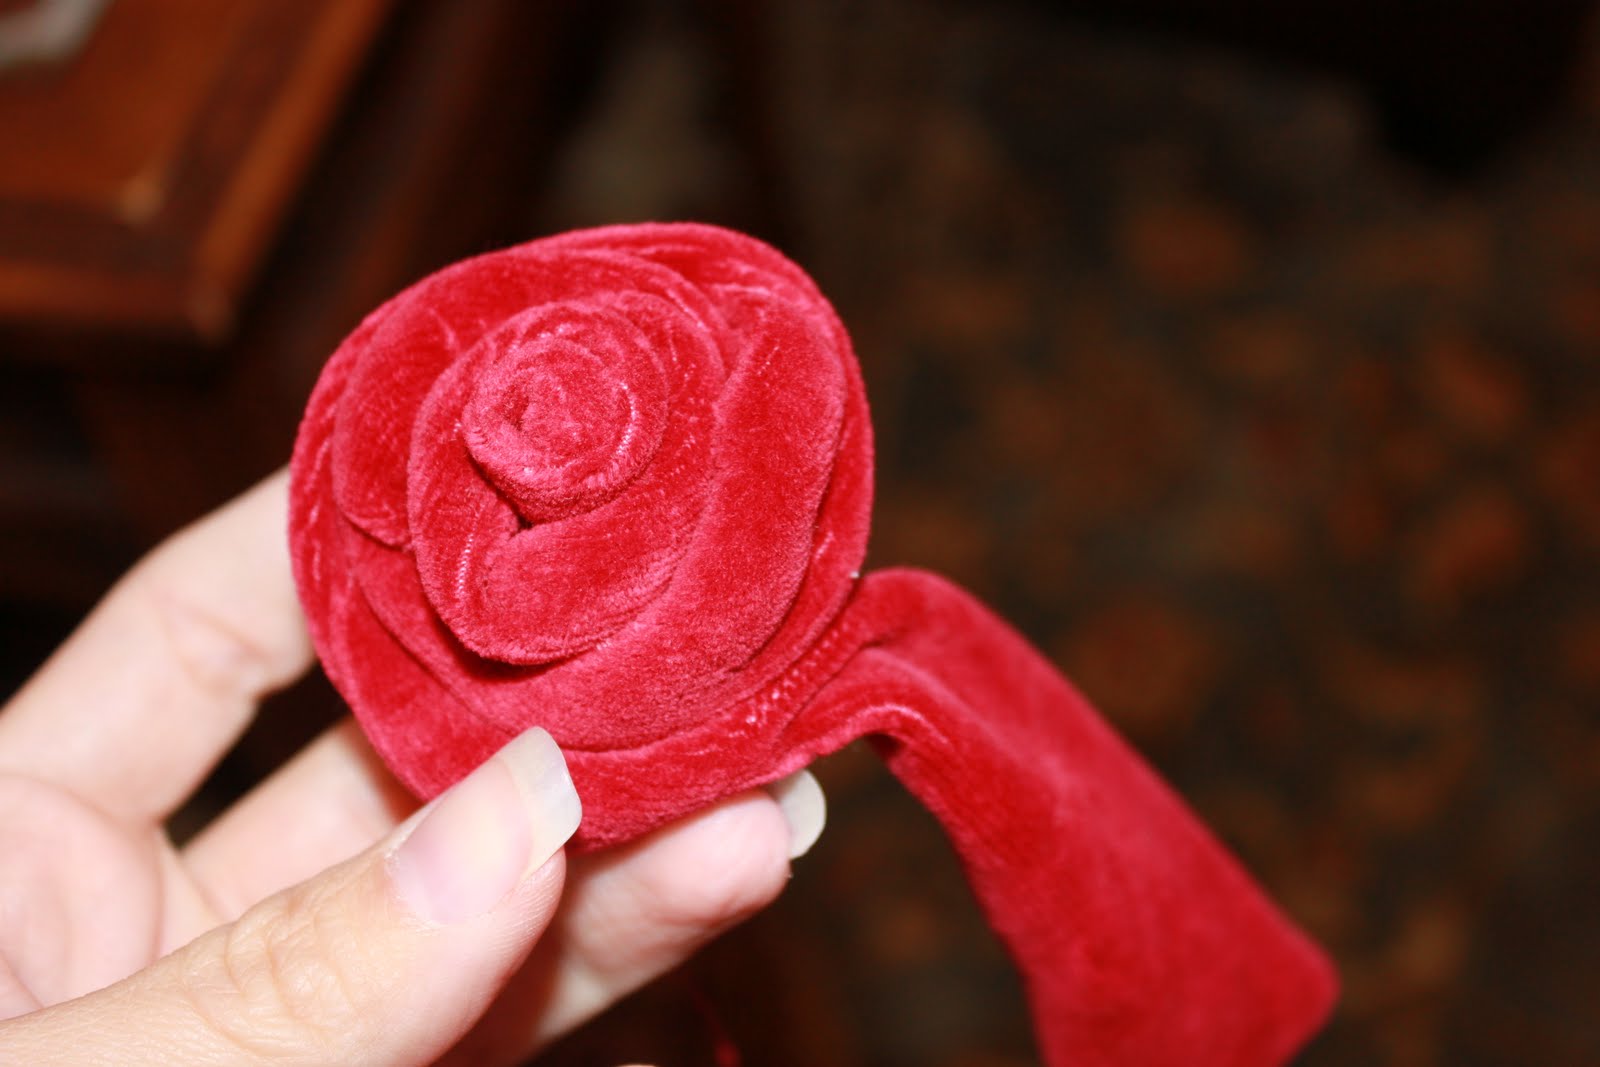
Begin to tightly roll the end with the tucked in tip.
As you roll the material, secure the roll in place with needle and thread. Simply pull your needle from one side of the roll to the other side one or two times.
Continue to tightly roll the material {approximately 4 times around} and stitch it into place as you go every half turn.
After {about} your fourth rotation around, start rolling the next rotations a little lower than the one before. Instead of tightly rolling the entire width of the material, as you have for the first 4 rotations, allow the top of the material more slack. Securely attach the base of the material for these rotations to the bottom of the flower/roll.
You can twist your fabric, fold your fabric or whatever else you decide to give the fabric a more layered feel. Your material should be taking on a more flower like appearance. There is no rhyme or reason, trust your instincts and make adjustments with each new rotation.
As you work your way around each new rotation, begin to stitch the bottom of your rose closed. This will help, with each new rotation, maintaining the closed bottom and open blossoming top shape you are trying to achieve.
Continue rolling the material, defining the shape as you go.
When you reach the size and shape rose you are happy with, work the last section down the side and onto the bottom of the rose instead of around another rotation.
Depending on how tightly or loosely you roll your flower up, you may end up with excess material that you can simply cut off. I had extra.
If you need to cut off the excess, fold the raw edges back into the material.
Sew the end of the material to the base of your flower. Cleanly and tightly sew the bottom of the rose closed.
Green thumb or not, you now have a perfect red rose guaranteed not to wilt.
Come back tomorrow and see how to make the stem.
©2011. For personal use only. Please do not use this tutorial for distribution or resale purposes. You are welcome to link back to this site. All borrowed content must be given proper credit. This is the intellectual property of While Wearing Heels.
Linked up and a big thanks to:

A Rose Is A Rose Tutorial...Part 1
How to Make the Rose
Would you believe that I made my rose out of a $1.49 Goodwill outfit?
Supplies: Any sort of velvet-like material could be used. You'll need enough material to cut an 18 inch long by about 4 1/2 inch wide strip. Red thread and needle and a sewing machine.
When you have your piece cut out, fold it in half {velvet facing in}.
Starting from one of the ends, sew from the fold on an angle to the open edge and then continue to sew up the length. Use a 1/4 of an inch seam allowance. *This fabric stretches and can be difficult to sew. Pinning makes will make it easier.
Trim the excess off of the angled end.
Turn the material right side out.
Tuck the angled tip back into the body squaring it off again.
Begin to tightly roll the end with the tucked in tip.
As you roll the material, secure the roll in place with needle and thread. Simply pull your needle from one side of the roll to the other side one or two times.
Continue to tightly roll the material {approximately 4 times around} and stitch it into place as you go every half turn.
After {about} your fourth rotation around, start rolling the next rotations a little lower than the one before. Instead of tightly rolling the entire width of the material, as you have for the first 4 rotations, allow the top of the material more slack. Securely attach the base of the material for these rotations to the bottom of the flower/roll.
You can twist your fabric, fold your fabric or whatever else you decide to give the fabric a more layered feel. Your material should be taking on a more flower like appearance. There is no rhyme or reason, trust your instincts and make adjustments with each new rotation.
As you work your way around each new rotation, begin to stitch the bottom of your rose closed. This will help, with each new rotation, maintaining the closed bottom and open blossoming top shape you are trying to achieve.
Continue rolling the material, defining the shape as you go.
When you reach the size and shape rose you are happy with, work the last section down the side and onto the bottom of the rose instead of around another rotation.
Depending on how tightly or loosely you roll your flower up, you may end up with excess material that you can simply cut off. I had extra.
If you need to cut off the excess, fold the raw edges back into the material.
Sew the end of the material to the base of your flower. Cleanly and tightly sew the bottom of the rose closed.
Green thumb or not, you now have a perfect red rose guaranteed not to wilt.
Come back tomorrow and see how to make the stem.
©2011. For personal use only. Please do not use this tutorial for distribution or resale purposes. You are welcome to link back to this site. All borrowed content must be given proper credit. This is the intellectual property of While Wearing Heels.
Linked up and a big thanks to:
Subscribe to:
Posts (Atom)