Showing posts with label dollar store crafts. Show all posts

Monday, August 19, 2013

DIY Faux Perfume Vase

Before I share my DIY Perfume Flower Vase, I have a confession to make.


I don't wear perfume.  To be really honest, I don't even like perfume.  I haven't since I was pregnant with Grace.  I don't even like for my husband to wear cologne.  And, yet, I can still admire the labels of a beautifully designed perfume bottle.


Though I may not like the smell of perfume, I do like the smell of flowers.  And, recently, I've been very lucky to have been on the receiving end of flowers.  The flowers have made pretty props to go along with our recent art projects and...


now has provided some inspiration to create yet another glass vase update.


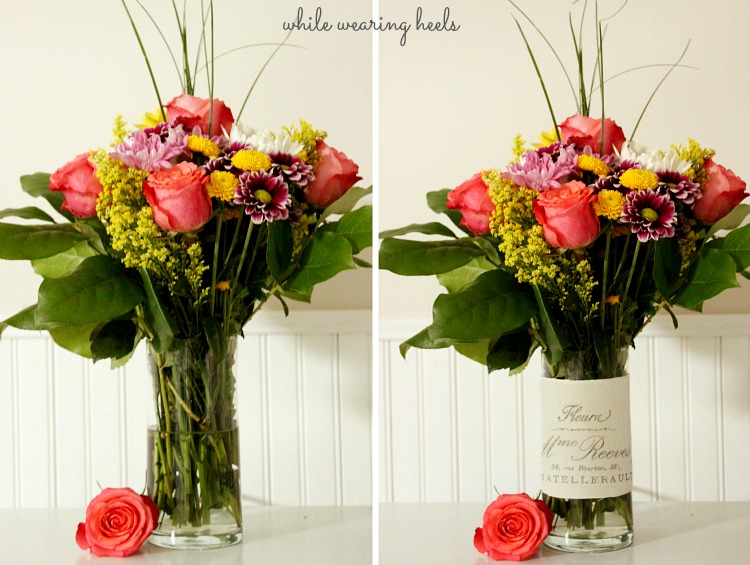
To make one of your own, grab a square vase and create a perfume label in Word.


Apply the perfume label to your vase using either glue or Mod Podge.

Fill your vase with flowers.


 And, enjoy your custom vase and beautiful flowers.


If you liked this vase update, make sure to check out these as well.


Linked to:

Mellywoods Mansion

{T} *From Dream to Reality Link Party ** Thursday Linky Party at Osie Moats * Be Inspired by Elizabeth and Co.   * Tutorials and Tips on Home Stories A 2 Z   * I gotta try that   * Off The Hook Link Party  * The Winthrop Chronicles  * Open Call Tuesdays on Salt Tree * Adventures of a DIY MOM * Take a look Tuesday at Sugar Bee Crafts * Blackberry Vine Tuesday To Do Party Coastal Charm * My Uncommon Slice Of Suburbia  * Tip Junkie   

{W}*Riverton Housewives Round Up  *Adorned from Above *Well Crafted Wednesdays *What I Whipped Up Wednesdays * Homemade by You Wednesday * Whimsy Wednesdays * The Fun In Functional * What I learned Wednesday * Someday crafts 

{TH} A Glimpse Inside  *  The Crafty Blogstalker * Made In a Day A Little Knick Knack * House of Hepworth's  * 52 Mantels *
 

Tuesday, June 18, 2013

Glass Flower Vase Cover

Whether on the receiving end or the giving end of flowers, I have a quick and easy glass vase cover that will make any bouquet of flowers even more beautiful.


And perhaps more personal.


Gather the following supplies, to make your own glass vase cover:  glass floral vase, scrap fabric (roughly 4 inches wide by 12 inches long), washcloth, *reusable freezer paper and a printer.


*To make reusable freezer paper:  using spray adhesive, spray the paper side (NOT the shiny side) of freezer paper and adhere it to a sheet of copy paper.  Trim off any excess freezer paper, leaving the finish size the same size as copy paper (8 1/2 by 11). 

Select an image or graphic.  The Graphic Fairy is a great source to find free graphics, which is where I found the image I used.

Print your image, running the copy paper through your printer, shiny side of the freezer paper facing the ink cartridge.  *If you are using an image with words, make sure you transpose or flip your image prior to printing.


If you skip this step, your image, once transferred will look something like this...


With a barely wet washcloth, dampen the area of the fabric you want to transfer your image onto.  Flip your freezer paper over, centering your imagine onto the dampened fabric.  Press firmly into the image, using either the back of your thumb or the back of a spoon, transferring the image onto the fabric.


And, just like that, you have successfully transferred an image onto fabric.  Use a hot iron to heat set the ink.


You can finish your ends by attaching no-sew Velcro, gluing it or using some double sided tape to secure it closed.  It all depends on how ambitious you are feeling.

Find a naked glass vase and dress it up.  It really does make any bouquet of flowers even more beautiful, doesn't it?


The best part of transferring images using freezer paper...you can just whip it clean and reuse it.


For similar projects check out my lavender sachet, made using the same technique described above OR another easy glass vase upgrade.


Originally shared at 'Or so she says...'

Friday, March 22, 2013

Specimen Art By Suburble

Looking for a quick, inexpensive fun project to get you in the mood for Spring?  Why not make an Egg-in-Nest Specimen Art piece.


Impressive Right? Sadly, I cannot take credit for this adorable project.  

The incredibly witty and very talented Tara, from Suburble, has graciously come to visit While Wearing Heels to share her Egg-in-Nest Specimen Art (which is one of many great projects  she has over at her new blog).

I guarantee she'll make you giggle.  

 
And, now, here is Tara and her Egg-in-Nest Specimen Art.


I was aimlessly wandering around the interweb the other day, and I came across a post on Balancing Home showing her spring mantle decor - featuring eggs in nests as specimen art. I loved the look, but Megan wrote that she had found her little nests on clearance - last year - at Target for $3. So I admired, bookmarked, and then said, "Well, unless Doc Brown drives the DeLorean onto my driveway, I guess that craft won't be happening this year!"


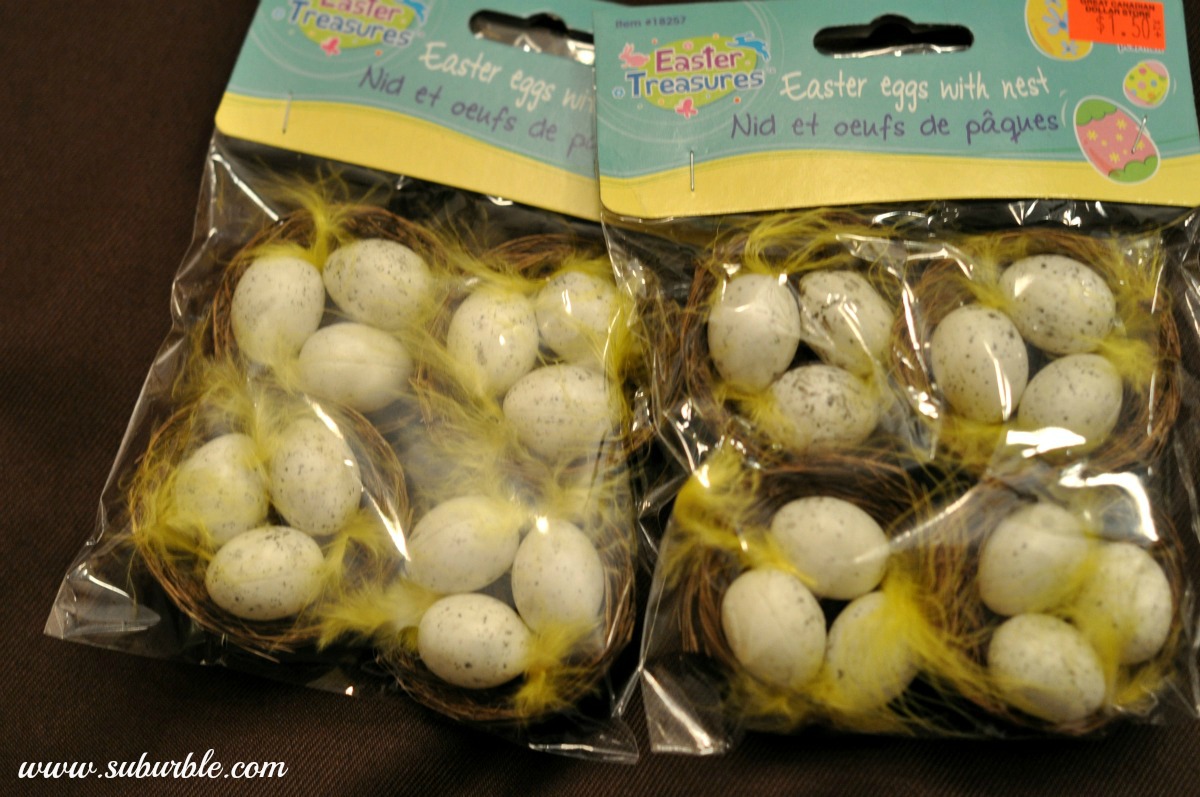
Then, I was strolling through the Dollar Store - like I do - and I came across these little beauties in the seasonal aisle. They were $1.50 (this particular dollar store has some things that are not just a dollar. Sigh.), but I picked up two packages. I can work with these! I feel craft-spiration coming on!


Then I opened them.

Holy crap. Is this where Big Bird's harem goes to lay their eggs? What kind of muppet atrocity is this?


Thankfully, the nests were easily "plucked". Ahhh... much better.


The original piece featured groups of eggs that were different colors (pink, blue, green). I looked at my speckled eggs and thought, "I can fix this!"

Because I didn't want the color to be opaque, I opted not to use my acrylic paints. Instead, I dug into the kids' craft supplies and came up with Crayola! I know - Martha could learn something from me, couldn't she?

Probably not.... but anyways...


I didn't really have a technique, per say. I painted with one color, and then dabbed on another color with a sponge brush. 


It requires a bit of trial and error. What's awesome is that because Crayola is washable, you can easily fix mistakes if you're a bit too heavy on one color.

And unless you have a pink paint handy, I wouldn't recommend trying out a red paint. I ended up creating something out of a vegan person's nightmare. Those eggs were promptly washed off.


I ended up with two bluish-green nests, which I quite liked. The sponge added a mottled quality to make the eggs look more realistic.

I attached the eggs to a piece of cardstock and matted it. They're attached with double-sided tape, and so far, so good! They're housed in the same frame that my It's Raining Hearts Valentine's Artwork was in. I just removed the glass in order to give it a shadow-box quality.


I'm quite happy with how it turned out! $3 in Dollar Store nests, perhaps $.10 in cardstock, and the rest was already kicking around the house! This could be a great kids' project (especially the plucking of scary feathers from the nest), but I did this project solo.

Oh! And a P.S. to this post: I understand why it is called "Specimen Art", but ugh, isn't the most unromantic way of describing it? I wish I was called "Collection Art" or something else a bit less "I'm going to dissect this in Biology class and try not to dry heave".

____________________________________________________________________________


I want to say a big thank you to the fabulous Amy for letting me crash her pad. She is an awesome lady (as I’m sure you’re all very aware of) and I am so honoured to have the opportunity to share my eggy craft with you all.

I invite you to pop over to my own blog, Suburble, and check out what sorts of hijinx we’re up to. In honour of my very first guest post, I’m offering a giveaway this weekend! 


Click over for the chance to win the Labelling Package O’ Your Dreams: 14 adhesive chalkboard labels, 14 blue adhesive vinyl labels and two chalkboard pens: one white and one silver! These labels are cut (by moi!) from indoor vinyl and are perfect for the pantry, the playroom, the craft room, your linen closet… you name it! The chalkboard pens will write on both colours of vinyl, and the greatest thing is that a little water on a cloth wipes them clean – you can write on them over and over again!

The giveaway closes at midnight, Monday, March 25th, and is open to American and Canadian residents. And because I’m a fledgling blog with a growing audience, your chances are quite possibly much greater to win!

I look forward to meeting you!  

Thank you so much Tara for visiting While Wearing Heels.  If you haven't already, go and visit her lovely blog, welcome her into the crazy world of blogging and leave her some comment love.

Monday, November 26, 2012

Pottery Barn Candle Knockoff

This Christmas, why not wow with a gift that looks like it came straight from Pottery Barn?


Where else would you go to create your Pottery Barn inspired gift?  The Dollar Store or Goodwill, of course.

Load up your basket with a glass candle stick, a tall glass vase, a pillar wax candle {which is becoming harder to find these days}, some white tissue paper, and a bag of cranberries (okay, you might have to go to the grocery store to buy the cranberries).


To create your hurricane, you’ll need some Gorilla Glue. Apply some Gorilla Glue to the top of your candle stick. Be warned: a little goes a long way. Put the candle stick on top of the vase and allow plenty of time for it to dry and adhere.


Now to give your pillar candle some Christmas cheer. The possibilities are endless, you could add a black and white picture or a poem to your candle. I decided to add some Christmas music to my candle.
Whatever you decide to add to your candle, you’ll need to print it onto your tissue paper. First, grab a piece of card stock (the color does not matter), some tissue paper, and some tape.


Tape your tissue paper onto the card stock.  To prevent printer jams, make sure you tape all edges of the tissue paper onto the card stock.


Make sure to load the tissue paper into your printer in the direction that will result in the tissue paper side being printed on and not the card stock. Then print your design. You may also want to guide the card stock/tissue paper by gently pushing down on it as the printer is pulling it through.


When it comes out of the printer, it should look something like this:


Cut the edges to free your printed tissue paper. This is far easier then trying to remove the pieces of tape.


Wrap the tissue paper around your pillar candle. I secured my tissue paper into place using a few push pins.


Grab your hair dryer. Set it on high or hot and begin to apply heat to the tissue paper.  You will start to see the candle wax grabbing ahold of the tissue paper.


Continue working your way around the candle, heating every part of the tissue paper to the pillar candle.The last step, putting it all together. Put some of those cranberries into the bottom of the hurricane vase.


Then add your pillar candle.


What’s better than a Pottery Barn gift? A gift made from the heart on a Dollar Store budget.


*I shared this post, last year, on Money Savings Mom, when it seemed like the wax candles were easier to find and my photography skills were obviously lacking :)


And be sure to check out my other Christmas inspired posts:

Star Wars Ornaments
DIY Advent Calendar
DIY Santa Beard

Monday, November 19, 2012

Gone Fishing...

Before you get visions of this girl baiting her hook with worms in hopes of catching a big fish, the kind of fishing I'm doing today, thanks to Minieco, looks more like this...


These cute little fish


are made from plastic dividers from the dollar store. 


A package includes yellow, blue, red and green plastic sheets and allows you to make12 sets of fish.


To make a set of your own, you can find the tutorial and the fish template are over at Mini-Eco.

When you've completed your set, throw them in the bath


for some bath time entertainment.


Or fill up a plastic bucket with some water and listen with delight to the stories your child will tell about the big fish that got away.


So, grab your fishing pole and head over to Minieco to learn how to make your own set.
Related Posts Plugin for WordPress, Blogger...