Tuesday, October 23, 2012

This Little Piggy Went Trick or Treating

If you follow While Wearing Heels on facebook, you already know panic had started to set in last week, as I rushed to complete Grace's Halloween costume.

I had a game plan, thanks to Real Simple, for the pig ears and nose.


I took some liberties with the ears.  Real Simple suggested using a single piece of pink felt {and you all know I am a fan of felt crafts} BUT I wanted more structure to Grace's piggy ears.

*Instead of using felt, I used a double layer of pink flannel.  I sewed around the ears, leaving the bottom open.  I ironed some Heat n Bond onto the inside of the ear, turned the ear right side out and ironed the ear together.  The Heat n Bond helped give the ear more structure.


For the body of the pig, I found a monkey costume at Goodwill for $3.99.  Originally, I thought I would use it to trace out a pattern for the body of my pig.  Instead, I decided to tack the pig fabric onto the monkey costume.


Let me tell you, that was easier said than done.

I kept hearing Tim Gunn's voice encouraging me to "make it work" as I struggled transforming a monkey into a pig.


 Somehow, I was able to 'make it work'...right down to the curly piggy tail...


I'd hope, if my monkey turned pig design walked the runway, Heidi Klum would be distracted enough with my model that I wouldn't hear her say, 'Amy, you are out'.


And, now this little piggy is ready to go trick or treating.

Until tomorrow...auf wiedersehen :)

Monday, October 22, 2012

Fall Party Goodie Bags - Part 2

The fall themed goodie bags for Grace's preschool fall party are done.


Interested in seeing what's inside?


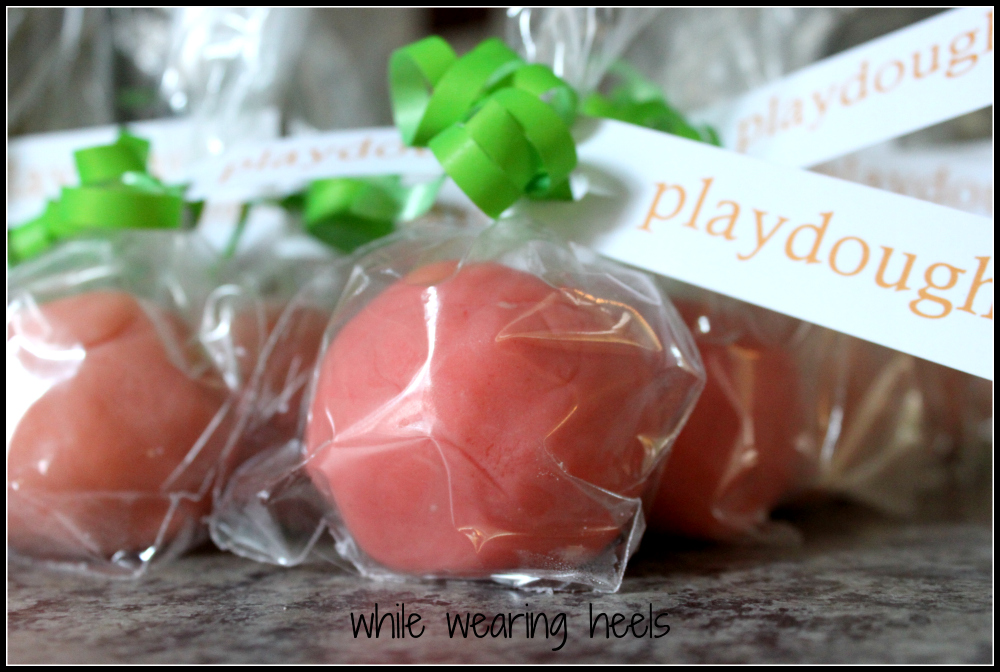
I included some stickers, 2 jelly bracelets, Snoopy temporary tattoos, a pumpkin straw, homemade play dough, a bag of goldfish {in lieu of candy}.


The key is to find things sold as sets.  Sticker books can be found at dollar stores or Michaels for as little as $1-$3.  Instead of keeping the sticker book whole, rip out the pages or cut the sheets in half to add to each goodie bag.  The rubber bracelets came as a set from the dollar store.  The straws I found at a local grocery store 8 straws for $1.  The splurge item, the Snoopy tattoos, were from another local grocery store.  They were a set of 20 and were $4. 

I made the playdough from scratch, the supplies I had on hand, so I considered this a no cost bonus goodie to add to the bag.

And, my favorite, a take home fall scavenger hunt {inspired by Carla from The River}.  I created this doing a google search for free clip art.  Using PicMonkey collage, I created the template for the scavenger hunt and uploaded the clip art images.  Printed out, I fit 2 to a page.


16 bags were made and filled for less than $16.


Did I mention, I've also volunteered to be a room mom for the Thanksgiving party?

Thursday, October 18, 2012

Something To Wine About

This past weekend, my husband's siblings, and their wonderful spouses {yep, that would include me}, went wine tasting and on a tour of several vineyards in Michigan.


Though there were reasons to whine...

Like the chartered bus we reserved never showed up SO we ended up having to take a short yellow school bus to our tastings.


And that the bus' windows would not close.


Or that it rained ALL day long.


Those bumps in the road {which are felt even more intensely while riding in a school bus} only added to the adventure.


Things may not always work out like you plan


but life is what you make of it.


So here is a toast, to all those moments in life that you could whine about...


Sometimes, it just a matter of seeing the glass as half full instead of half empty.


Wednesday, October 17, 2012

Fall Party Goodie Bags

This is a year of firsts for me.

Grace started preschool for the first time...and I have volunteered to be a room mom for the first time.

I have found myself in charge of goodie bags for her "fall" party.  Since it's a "fall" party, we were told to avoid using ghosts, witches or anything that has a Halloween theme. 


Fortunately, timing is everything. 

Erin from Just*Grand shared a tutorial for Pottery Barn Knockoff Decorative Matchboxes and she used the cutest pumpkin graphic from The Graphic Fairy. 

Inspired, I decided to use that pumpkin graphic and print it out on brown paper bags.


I copied the graphic to a word document, adjusted the paper guide on my printer to securely fit the brown bags and printed them out.  *It did take a few runs to get the placement of the graphic right.  To help the paper bag feed through the printer, as the printer was grabbing the bottom of the bag I was also applying gentle pressure to the top of the bag pushing it down.


18 bags later, I think they make the perfect "fall" party goodie bags.


And, I've already started to fill them. I found a quick and easy play dough recipe from Musings From a Stay at Home Mom. One batch made 5 rolls of play dough. 

 
So, experienced room moms out there...what else do I fill these goodie bags with?


This may be my first time as room mom but I am determined to make sure it doesn't look like it's my first.


Tuesday, October 16, 2012

DIY Lavender Sachet

Did you know lavender is known to help reduce stress and prevent insomnia?


When I came across some freshly harvested lavender, from a local flea market, it was as if I had been given a secret potion that would help me relax and sleep.

BUT before I could relax and sleep, I had to think of a more stylish way to store my lavender than a ziploc bag. 

The solution, a lavender sachet, of course.


Gather the following supplies:
Lavender
Muslin {or fabric of preference}
Printer
Copy paper
Freezer Paper
Spray adhessive


Thanks to Home Frosting's wax paper transfer method, I was able to take a *graphic from The Graphic Fairy and transfer it onto fabric.  *The image I selected originally said 'Grain', using PicMonkey, I removed 'Grain' and added 'Lavender'.    

The concept is really simple.  Using spray adhesive, spray the paper side of freezer paper and adhere it to a sheet of copy paper.  Trim off any excess freezer paper.  Run the copy paper through your printer, the shiny side of the freezer paper facing the ink cartridge.  *If you are using an image with words, you will need to flip your image.


Moisten the fabric.  Turn the printed image {freezer paper facing fabric} onto the damp fabric and evenly press down with your finger over the back of the copier paper.


It took 2 attempts to determine the correct amount of moisture to apply to get the image transferred correctly.  The fabric should be barely damp. 


Though the image will transfer onto your fabric, there will still be remnants of the image on the paper, so take care in lifting the paper up so that it doesn't smudge.  Depending on how dark you want your image, you can get two transfers out of one printed image.


The best part of this freezer paper method, you can just wipe the image off and reuse the same piece of paper.


After your transferred image has dried, cut out the fabric to make your sachet.  Mine is cut approximately 4 by 5 inches.


Leaving a 1/4 of an inch seam allowance, sew around the sachet leaving an inch gap to turn your sachet right side out.  Cut the corners off so when turned the right way, your corners will be crisp.


Turn the sachet right side out.  Through the 1 inch gap, fill your sachet with your lavender.  Hand sew the gap closed.


Much better than a ziploc bag, right? 


Breath it in, relax and enjoy a peaceful night sleep.
 
Linking up to and a big thanks to:  Clever Chicks Blog Hop

Monday, October 15, 2012

Put a Pin In It: Ironing Mat

One of the keys to living in a small house is to maximize your space.

SO, when I saw a quilted ironing mat that fits over your dryer, from Solutions, I knew I needed one.

Cue email to my mom, asking her if she could make me one.


She gathered the following supplies:

1 1/4 yards of Therma-Flec Heat Resistant Cloth, which is approximately $9.00 a yard 
1 yard of Insul-Bright {which is what oven mitts or pot holders are insulated with}, which is approximately $4 a yard
6 strong magnets
Binding


She cut out the Insul-Bright and Therma Flec Heat Resistant Cloth to make a 21 inches wide by 33 inches long mat.

The mat was quilted using cross hatching, to hold the Insul-Bright into place.  Then she added a binding around the edges.


To make sure the mat remained in place even during vigorous ironing, she added 6 heavy duty super strong magnets to the edges.


To be honest, I rarely vigorously iron anything.  Now that I have my own ironing mat cover, I do iron more {mostly crafts} and now the top of my dryer stays clean {this used to be a favorite stacking spot of mine}.

If you want to make your own ironing mat and are looking for a more detailed tutorial, go check out Thrifty Crafty Girl. 

Link Party Websites

{T} * Be Inspired by Elizabeth and Co.   * Tutorials and Tips on Home Stories A 2 Z   * I gotta try that   * Tips and Tricks Tuesday at Stringtown Home  * Delicate Construction * The Winthrop Chronicles  * Open Call Tuesdays on Salt Tree * Adventures of a DIY MOM * Take a look Tuesday at Sugar Bee Crafts * Blackberry Vine Tuesday To Do Party  *  Coastal Charm * My Uncommon Slice Of Suburbia  * Tip Junkie   

{W} *In Bloom Link Party *Adorned from Above * All Star Blogging Party *Well Crafted Wednesdays *What I Whipped Up Wednesdays * Homemade by You Wednesday * Whimsy Wednesdays  * Blue Cricket Design  * The Fun In Functional * What I learned Wednesday *   Home Happy Home * Someday crafts 

{TH} * Farm Girl Fest* Think Tank Thursday* Thursday Linky Party at Osie Moats* Taylor House ThursdayThursday's Temptation Link Party* Delightful Order* A Glimpse Inside  *  The Crafty Blogstalker * Made In a Day  * Somewhat Simple* A Little Knick Knack* House of Hepworth's * Chic on a Shoestring * 52 Mantels *
 

Friday, October 12, 2012

Cleaning Up My Craft Area

Thanks to October Overhauling, I have reorganized my craft supplies.


The real miracle here is that you can actually see the tile countertop again.

I tend to craft with reckless abandon.  In the process, I can't be bothered with things like cleaning and organizing. 

Instead, I stack and throw and jumble.


But, this often leads to me wasting a lot of time and energy looking for the most random of things. 


I'll admit, organized is probably a more efficient way to go.


That basket, on the top shelf, needs to find a new home because...


In 2 short weeks, we are having our vintage library ladder installed in our pantry.  When it finally gets installed, I'll be showing off the rest of the pantry.


I even cleaned the stack of crafts and supplies that have found a home next to my sofa.  


I purged down to the bare essentials.  The only thing you'll find next to my sofa {besides for cords} a small bag with some of my basic sewing necessities. 


Getting everything organized was actually the easy part.  Keeping it all organized is going to be the real challenge.

Related Posts Plugin for WordPress, Blogger...