Showing posts with label Christmas crafts. Show all posts

Monday, December 3, 2012

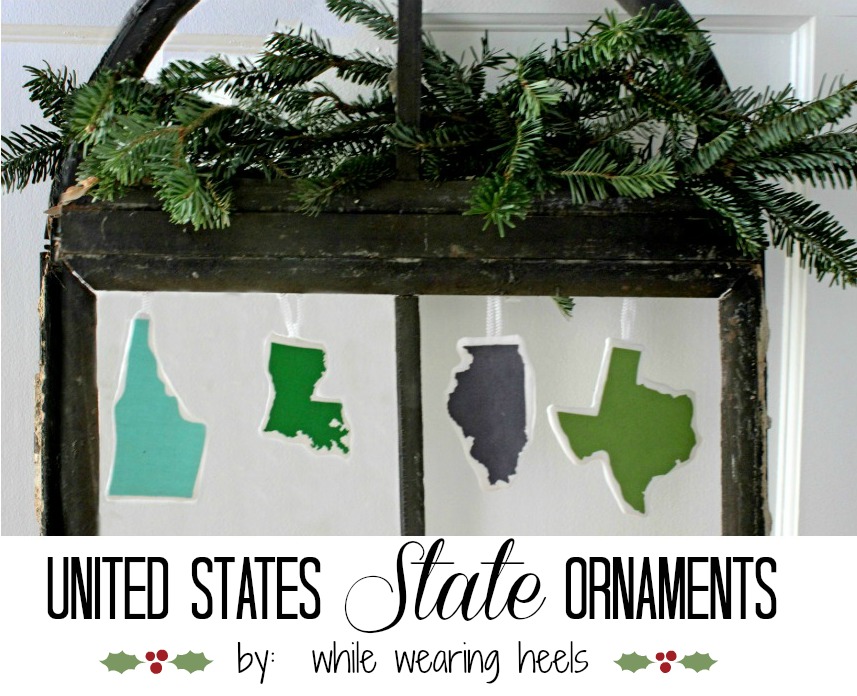
United States STATE Ornaments


These 'United States STATE Ornaments' were inspired by the United Scraps of America Quilt I made earlier this year.


This project, though, was much quicker!

You can make a state ornament for where you've traveled, where you were married or where you child was born. 


The possibilities are endless.

To make some of your own, gather the following supplies:

White Fabrics and Solid Colored Fabric
Batting
Ribbon
Water Soluble Pen 
Ultra Hold Heat-n-Bond
Traceable Mirrored Image of States

To get started, decide what state or even country you want to create.  Trace the mirrored image of your state onto Heat-n-Bond.  Iron the Heat-n-Bond onto the back side of the colored fabric.  Using sharp scissors cut the image out.


Place the image you just cut out onto the white fabric.  With your water soluble pen, trace around your image making it approximately 1/4 of an inch bigger all around.  Cut 2 pieces out of white fabric and one out of batting.  Pin the 3 pieces together with the ribbon loop inserted between the 2 white pieces of fabric.


Sew around the perimeter of the state shape.  Leave about a 1 inch gap unsewn.

Turn the state right side out through the unsewn gap.  Push the raw edges of your gap inside the shape and top stitch closed.  Remove the backing from the Heat-n-Bond on your colored fabric.  Place the colored fabric onto the white ornament and iron it into place.


And, just like that, you have the Sunshine State. 


Once you get started, I guarantee you won't want to stop.


And be sure to check out my other Christmas inspired posts:

Star Wars Ornaments
DIY Pottery Barn Candle
DIY Advent Calendar
DIY Santa Beard
Christmas Flower Boxes
Pine Needle Gift Tags
Pucker Up Ornament

Linked up to:


Thursday, November 29, 2012

Pine Needle Gift Tags

If you are like me and have pine needles dropping from the tree, instead of tossing them, why not use them for your gift tags?


 Just grab some pine needles, card stock, scissors and glue. Begin by cutting out the shape you want for your tag


Using my mini set of letter stamps, I stamped 'JACOB' onto the tag.  AND, I finally got to try Did Someone Say Party's trick of using a rubber band to hold the mini letters together to keep them straight while stamping...and it worked perfectly.


Using glue {I used a glue stick}, glue your needles down into a pine tree shape.


Add a ribbon and attach it to your gift. 


Does this pine needle gift tag leave you pine-ing to make your own?

 
And be sure to check out my other Christmas inspired posts:

Star Wars Ornaments
DIY Pottery Barn Candle
DIY Advent Calendar
DIY Santa Beard
Christmas Flower Boxes


Link Party Websites

{T} * Be Inspired by Elizabeth and Co.   * Tutorials and Tips on Home Stories A 2 Z   * I gotta try that   * Tips and Tricks Tuesday at Stringtown Home  * Delicate Construction * The Winthrop Chronicles  * Open Call Tuesdays on Salt Tree * Adventures of a DIY MOM * Take a look Tuesday at Sugar Bee Crafts * Blackberry Vine Tuesday To Do Party Coastal Charm * My Uncommon Slice Of Suburbia  * Tip Junkie   

{W} *In Bloom Link Party *Adorned from Above * All Star Blogging Party *Well Crafted Wednesdays *What I Whipped Up Wednesdays * Homemade by You Wednesday * Whimsy Wednesdays  * Blue Cricket Design  * The Fun In Functional * What I learned Wednesday *   Home Happy Home * Someday crafts 

{TH} * Farm Girl Fest* Thursday Linky Party at Osie MoatsTaylor House ThursdayThursday's Temptation Link PartyDelightful OrderA Glimpse Inside  *  The Crafty Blogstalker * Made In a Day  * Somewhat SimpleA Little Knick Knack* House of Hepworth's * Chic on a Shoestring * 52 Mantels *
 

Thursday, November 8, 2012

Pottery Barn for Kids Knockoff Advent Calendar

While grocery shopping today, Grace noticed that there were Christmas decorations out.  Then, she so astutely pointed out, but it's not even Christmas.

 
Ah, yes.  The world of retail and blogging are very much the same.

Thank goodness Grace doesn't read my blog because it's about to get a little Christmas-y around here as well...and yes, I know, it's not even Christmas yet. 

First up, my knock off version of Pottery Barn for Kids advent calendar.


It is 90% no sew AND the sewing that is required {attaching the pockets to the tree} can all be done by hand.

Since it's no sew, you can even get the kids involved.  You can use the patterns I provided


OR you can create your own designs.

Either way, since it's not even Christmas yet, you have plenty of time to make one of your own.

You can find the tutorial along with 25 patterns for each pocket here:

Advent Calendar Part 1
Advent Calendar Part 2
Advent Calendar Part 3
Advent Calendar Part 4


And be sure to check out my other Christmas inspired posts:

DIY Pottery Barn Candle
DIY Star Wars Ornaments
DIY Santa Beard


Monday, December 19, 2011

More Homemade Ornaments

With less than a week before Christmas {seriously where has the time gone}, this weekend was all about making ornaments.

Top on Grace's Christmas list is a kitten. I don't think that Riley would appreciate the addition of a cat SO I made Grace this ornament, which is as close to a kitty as she is going to get this year.


As I have mentioned, I prefer adding a homemade gift tag to the top of gifts. Loving all things vintage and kitschy I decided to make a Volkswagen van and personalize the license plate.


I received the highest compliment from my husband, when after he saw it, he suggested we need one as well.

I also made a Polaroid tag but since this is going to someone that is 11 I am not even sure she'll know what it is.


Of course, after I finished the Polaroid, I saw the coolest tutorial from Katie Cupcake on making a felt Polaroid ornament incorporating a real picture.

One of my favorite ornaments, that each year gets hung on my tree, is a salt dough ornament I made in kindergarten {a long time ago}.


This year, as a family, we made our own salt dough ornaments. The Christmas trees have one of each of our fingerprints {hopefully, once painted, the fingerprints might look like ornaments or lights on the tree}. The circles have thumb print hearts. My favorite, Grace's partial hand print.


I found the recipe over at Busy Bee Kids Crafts. It does take about 4 hours in the oven to completely dry out your ornaments out SO we ran out of time to paint them...can you guess what we have planned to do today?

Friday, December 9, 2011

Santa's Beard 'Ho Ho Ho' How To

While looking through the current J Crew catalog, I noticed this adorable little boy with the cutest Santa beard {which they are not selling, neither the boy nor the beard}.


I was inspired. So I decided to make my own.


Want to make one too?

Well, go grab the following supplies:
White Felt or fleece {I used fleece}
Elastic
You'll need your sewing machine and you may need to hand sew a bit.


Using this pattern or make one of your own...


Cut out the mustache and beard. For each {the mustache and the beard} you'll need to cut 2 parts for each pattern piece.


Sew your mustache together. I decided to hide my stitches on the mustache so I sewed around the mustache leaving a 1/4 of an inch seam allowance.


I also left an opening so I could turn my mustache right side out.


With the beard, I let my stitches show, so I sewed around the entire beard as close to the edges as possible, leaving no openings.


Hand sew the mustache to your beard.  Sew it into place stitching the bottom of the mustache to the top points of the beard.


Measure and cut your elastic to fit around your Santa to be's head.  Hand sew the ends of the elastic approximately in the middle of each mustache, from the back.  Check how it would fit and where to place it before securely attaching it.


Then find a Santa that wants to show it off.


Now I just need to find a Santa hat.


And be sure to check out my other Christmas inspired posts:

Star Wars Ornaments
DIY Pottery Barn Candle
DIY Advent Calendar
Christmas Flower Boxes
Linked Up To:

Related Posts Plugin for WordPress, Blogger...