


My love of felt is what has sparked, what I'll be calling: 'I heart fake food' tutorials. Today, I'll start with a felt strawberry tutorial.

Supplies needed: Red and Green Felt, Fiberfill, Needle, Red, Green and White Thread, Optional: Strawberry Container
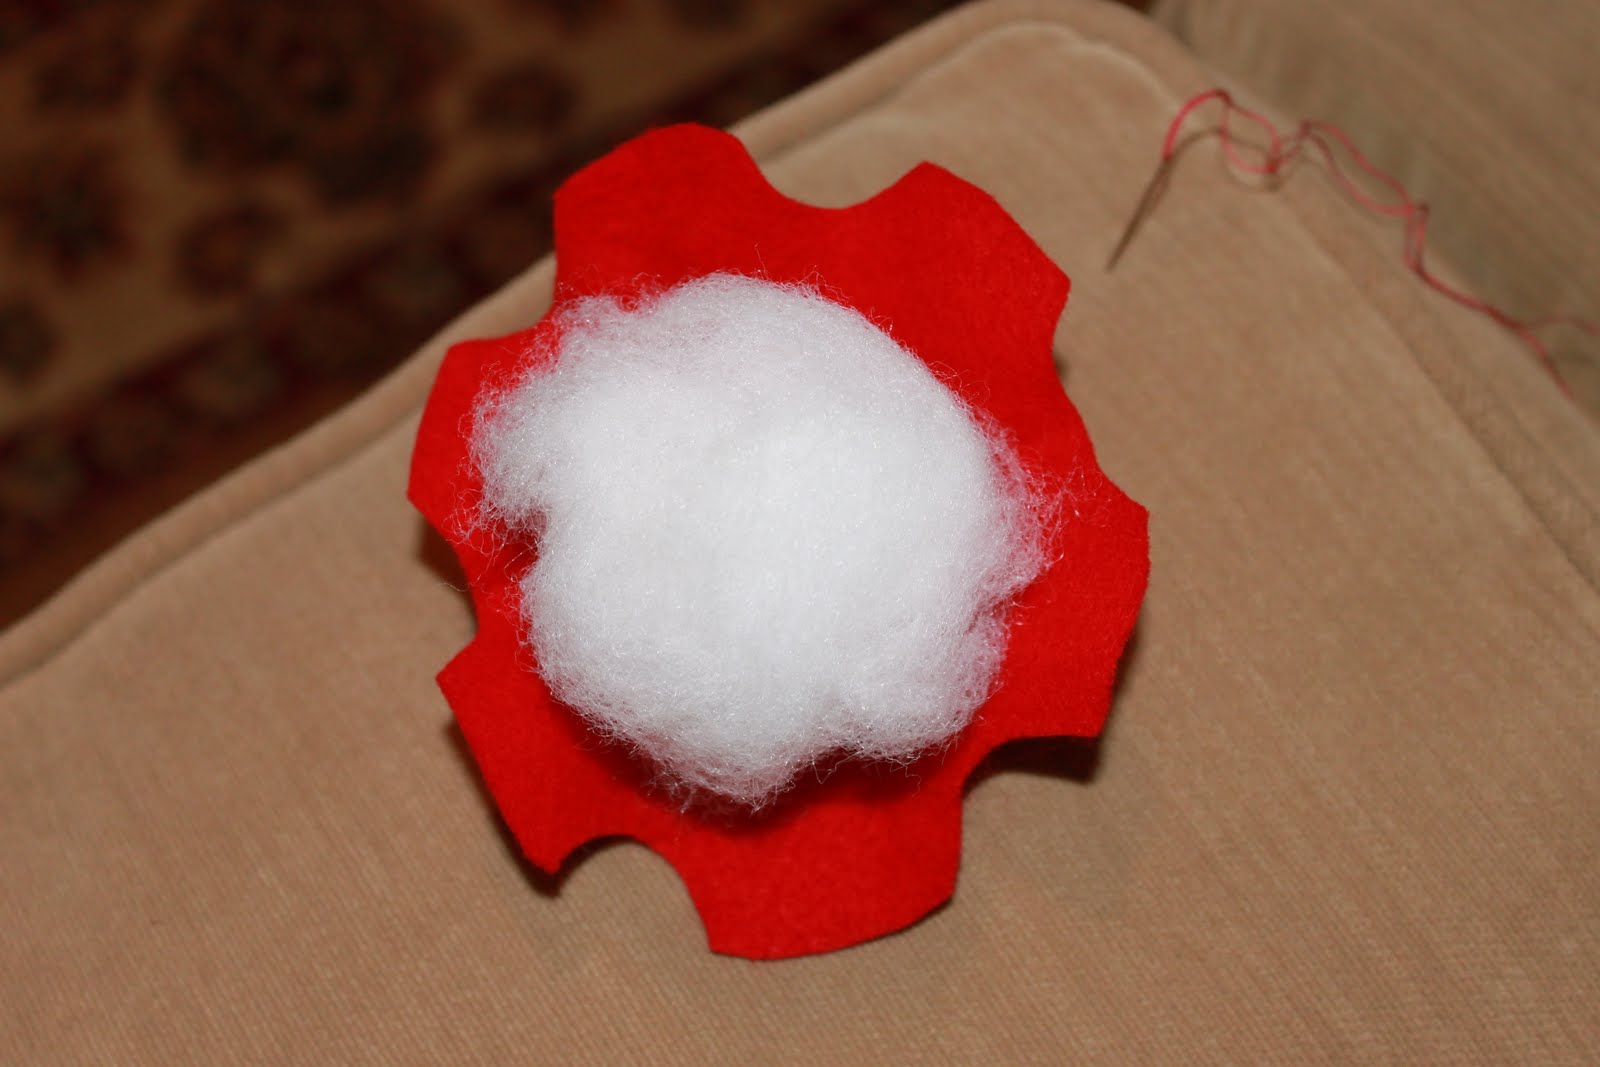
Using the pdf pattern, which can be found here, begin to cut out your strawberry. Cut the body out of red felt and the stem out of green felt.
Make an indentation in the center of the strawberry body. Tightly roll up fiberfill, about the size of a marble, and place it in the indentation.

Stuff the rest of the strawberry with fiberfill. It squishes down so generously fill the strawberry.
Thread your needle with red thread (I use 2 strands of DMC thread). Knot the end of the thread, don't worry about if the knot is exposed or not. Do a running stitch around the edge of the strawberry body.

As you continue around the edge of the strawberry, start to pull the thread taunt which in turn will gather the felt you just sewed through into folds.
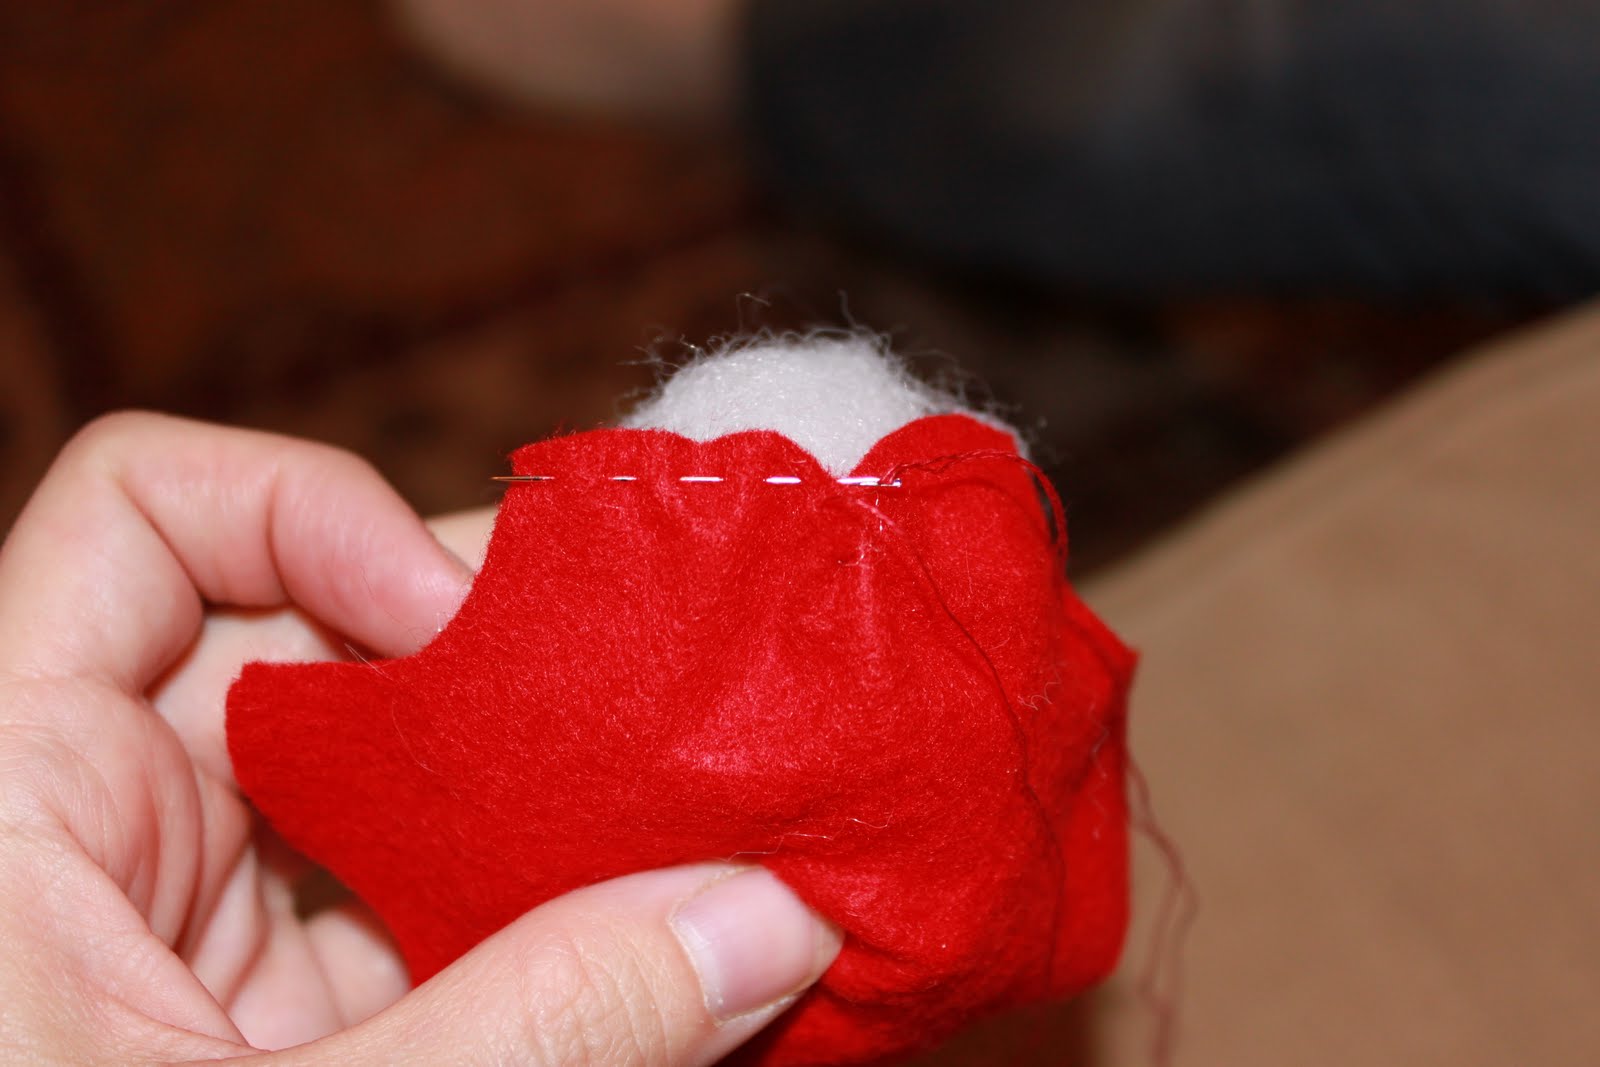
When you have stitched around the entire strawberry, continue pulling the thread taunt resulting in a tightly gathered circle on the top of your strawberry.

Sew the opening of the circle closed. Work your needle from one side to the side opposite closing the opening. It does not need to be perfect, this will be covered up by the stem. Knot your thread and detach.

Re-knot the end of your red thread. Push your needle in, just above where you placed the marble sized fiberfill ball in the bottom of the strawberry, and pull it straight through to the other side. Pull the thread tight so that both sides pucker in. Continue this step, stitching back and forth in the same spots, a few times until the pucker holds in place. The result should look like dimple on both sides of the strawberry. Knot and detach.

Thread your needle with green thread, again, I use only 2 strands of DMC thread. Begin to stitch the stem to the top of the strawberry. Felt is a wonderfully forgiving material, if need be, stretch it to make sure the stitches used to close the top of the strawberry are not exposed.

It's starting to look like a strawberry, isn't it?

To add strawberry seeds, thread your needle with white thread (again, I used 2 strands of DMC thread). Start with a thick knot at the end of your thread. Select a spot on your strawberry you want to start, pull your needle through the strawberry, leaving the knot exposed (you may need to trim any thread that is sticking out of the end of the thick knot you made). Where your needle has come out of the strawberry, make a French knot. I wrapped the needle 4 or 5 times to make my French knots. I continued to use the same thread, making no cuts, continuing to make French knots over the body of the strawberry. I ended my French knots where I made my dimples, covering my red knot with a white French knot.

One strawberry is cute.
But a dozen strawberries is berry cute.


If you enjoy this tutorial, be sure to follow my 'I heart fake food' tutorials! You'll find over 15 realistic felt food tutorials.


Just saw this on One Pretty Thing. They are perfect. Well done.
ReplyDeleteThanks KJ for your feedback! Hopefully you'll keep checking in because I'll have lots more fake food tutorials.
ReplyDeleteWhat a great idea to save a real strawberry carton to store those fantastic little treats!
ReplyDeleteThanks for linking this tutorial up at my Felt Food Roundup on OneCreativeMommy.com.
I think my oldest is going to visit these posts over and over as she creates!
These are adorable. I think they look so cute in the container especially.
ReplyDelete